Showing posts with label quilting. Show all posts

Wednesday, December 3, 2014

Tackling the BEAST

The Biggest of them All


Remember this UFO?


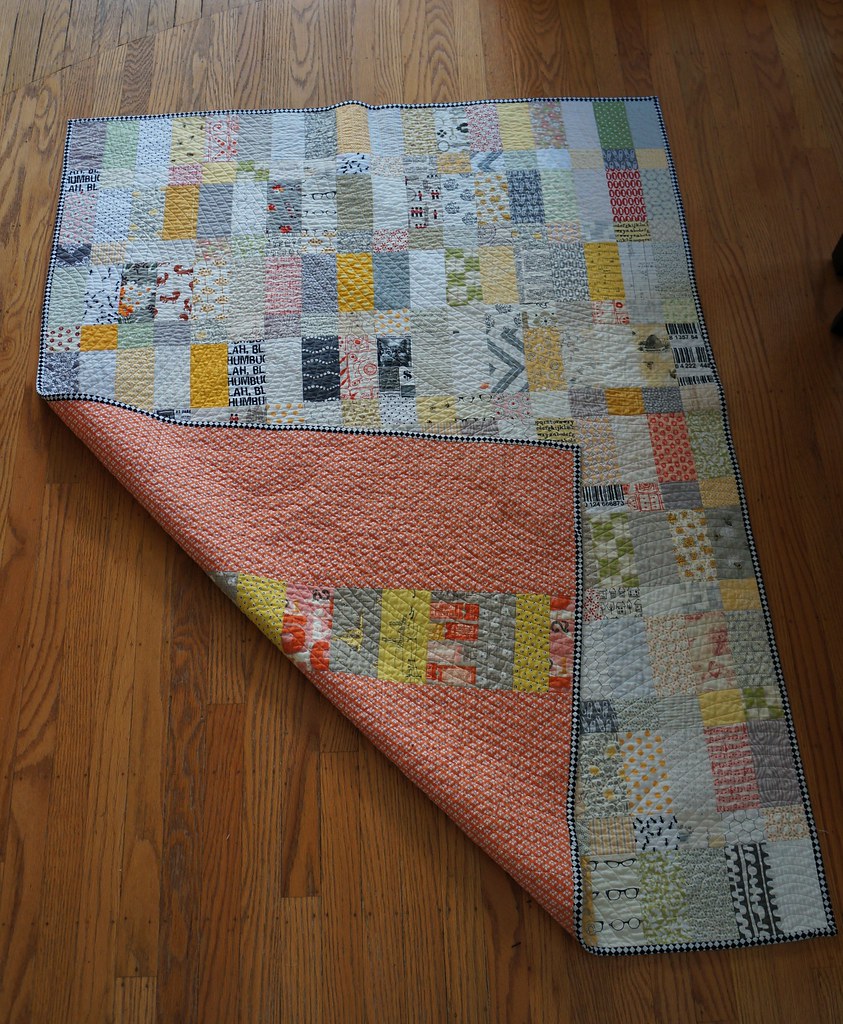
A twin size quilt for Brother. I have been pretty intimidated by idea of quilting this at home. I toyed with the idea of renting time on a local long arm machine, but decided I am too cheap and too busy to make that work.

After a lot of the usual hymning and hawing, I decided to keep it simple just do straight line quilting.

I pin based half of the quilt and spray basted the other half. I figured that if the spray worked out well, after I quilted that half, I could take the pins and out and spray the other half. That way at least half of the beast would be fully secured at any given time.

I'm not going to lie, this is A LOT of quilt to wrangle. I moved my machine as far over and as far forward on the desk as I could to allow for maximum work space.

The first bit in the very middle was the hardest. After that, it got quite a bit easier and I hardly noticed the giantness of the quilt. I did a full 3.5 hours and finished half of the quilting!!!

The rest didn't go quite as quickly, but I was excited to get this done and managed to find time here and there to get it all finished up. All that is left now, binding the beast. I have the fabric and plan to machine stitch and finish with a zig zag as opposed to hand stitching. I know that this quilt will need to endure a lot of washing so I want it to be extra durable.


The quilty goodness.

Hopefully this will be a finish very soon, but there are a few other projects out there distracting me. . .

Tuesday, September 23, 2014

Penny Patch: Work in Progress

Following Along

When I first saw Rachel's Penny Patch quilt and that she was offering a quilt along, I was very excited. I loved the original quilt (pictured below) and the coincidentally the colors she chose for the QAL were the same ones I had in mind when I thought of making my own :)


I quickly purchased fabric, of course, the easy and fun part! This time I was even a good girl and used several prints from my stash. Then like so many other things, it sat and waited for me to have time and the desire to tackle the cutting. I have come to realize that cutting is one of my least favorite parts of the process. I do my best to power through all the cutting in one fell swoop knowing that if I don't, it could be a long while before I am willing to do it again. 

Cutting


This meant that long after the QAL was over, I set out to cut out my fabric. This was MUCH trickier than I anticipated in terms of cutting the right number of fabrics in the right colors and right sizes. I kept my laptop handy and referred often to the instructions. The process was tedious and it took me an ENTIRE Saturday. I kid you not. I wanted so badly to start sewing things together, but it was just too darn late.

Penny Patches


Next it was time to sew together the penny patches. Since you actually sew strips and then cut them down, it meant that I had to put my penny patches together BEFORE I could lay the quilt out and see what I wanted to put together. Boo erns.

Another confession, I am very OCD about my quilt layouts. I put everything out on the dining room floor and crawl around on my hands and knees swapping little pieces here and there until everything is just so. I have tried being more loosey goosey about it, but it just makes me nuts and I end up ripping things out, and going through the tedious layout process anyway.

But in this case, there wasn't much of choice, I put together fabrics I liked and got sewing.  With that done, I could finally lay out the quilt. Yay!

Layout Attempt #1


Hmm. It looked like nothing but a hot mess to me. Does anyone else agree? The first time I laid everything out, I paid no attention to what direction the darker value fabrics were going on the larger four patch squares, only the penny patches. It just made everything "frustrating" looking. Despite the cohesive color scheme, nothing really looked like it belonged together and it felt like the quilt was fighting with itself.  Defeated, I put everything back in a giant pile and went and had a glass of wine.

Layout #2


To minimize the messiness of the ba-jillion pieces, I made the un-me like decision to sew the larger four patches together before laying the quilt out again. I was nervous, but feeling cautiously optimistic. This time when I laid the pieces out, I made sure that the darkest values were all going the same direction. I also did a better job of dispersing my low volume prints throughout the quilt. This was also partly due to my pre-sewn pieces.


I'm not sure if you can tell the difference between the two, but I sure could. I was much happier with this second layout.

And then . . .


I sewed it all up! Since I was very wary of pieces getting out of place in my carefully constructed layout, I sewed the rows together straight across instead of putting the little penny patch squares together before constructing the rows. It made the process a bit slower, but I was more comfortable with it.


I was so excited that I snapped a photo a few rows in!


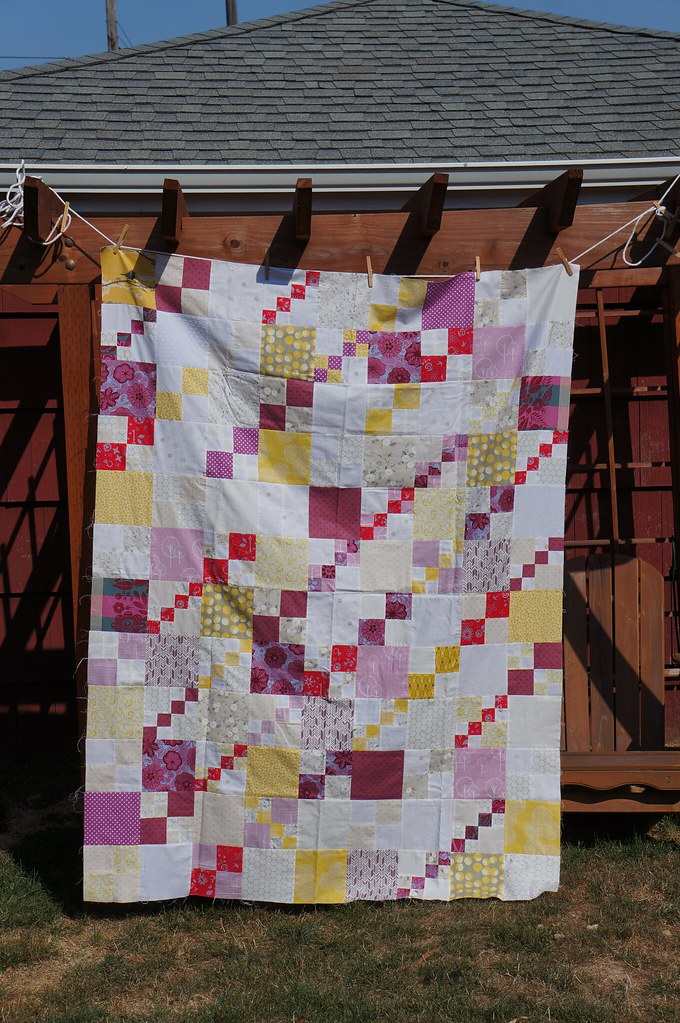
Voila! My penny patch quilt top!

DSC08928

FMQ, eek!


Yep, that's right folks, my plan is to free motion quilt this one. It will be my first. I am buoyed by the fact that the pattern is very deliberate. I don't have to try and fill in space creatively and hope it all works out. Rachel put a great tutorial together on the dogwood quilting pattern, to compliment the original one from Elizabeth.

Wish me luck.


Thursday, August 28, 2014

Low Volume Loveliness Complete!

Let's start back where we left off shall we?  I talked about my low volume quilt here and here.  The verdict...

I love it!


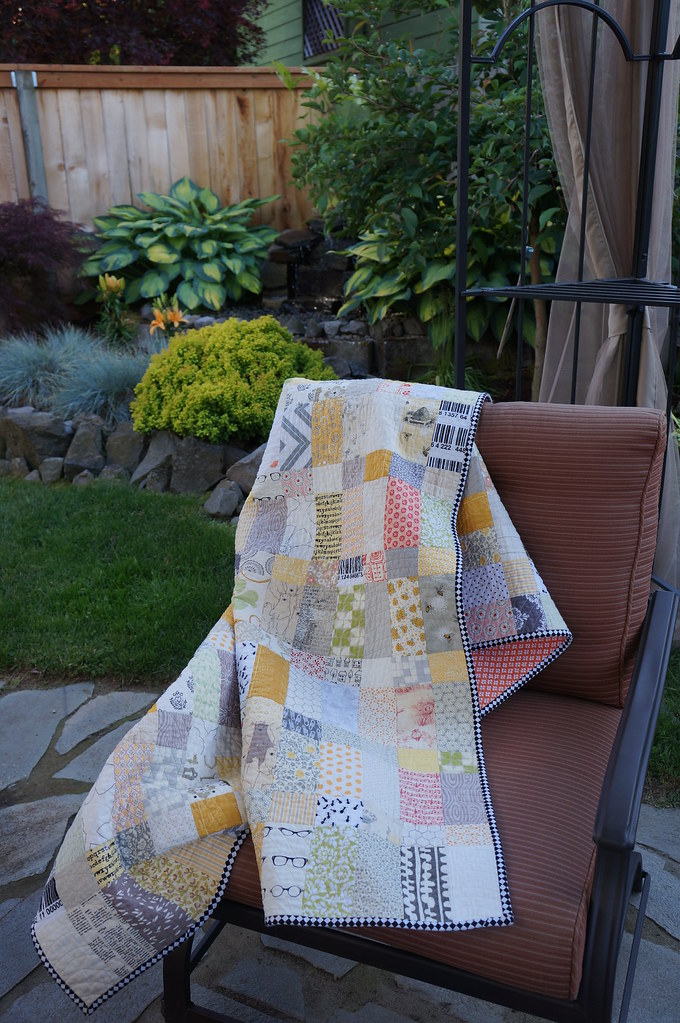
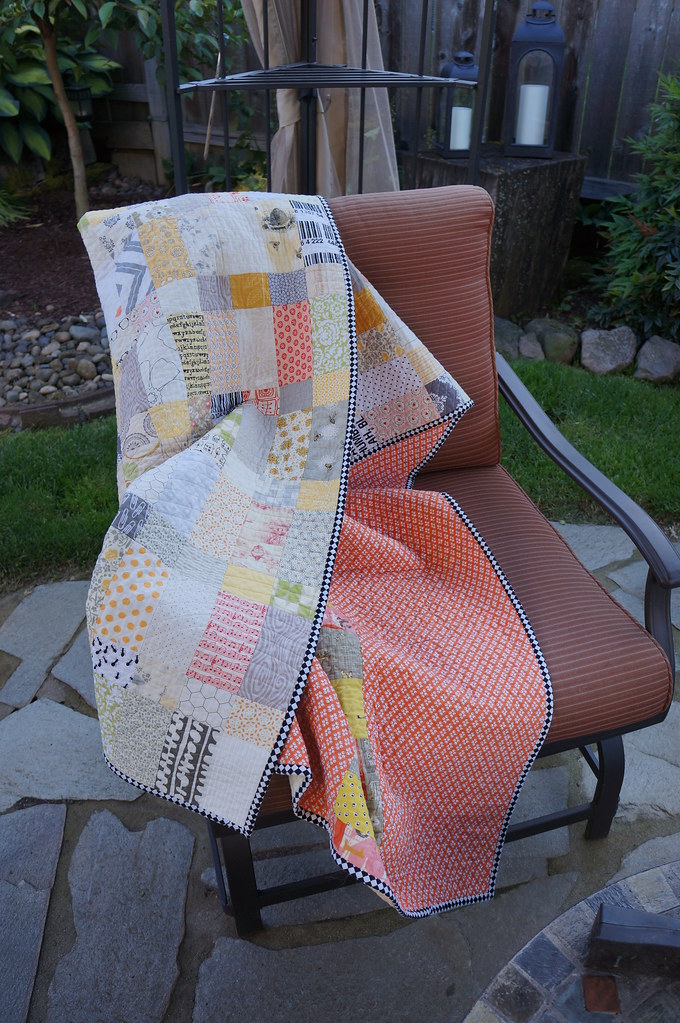
I love this quilt.  It came out perfect.  I may have almost cried a few times during the process when I was pretty sure that I ruined it, but in the end, I am over the moon happy with it!


Quilting


This was decidedly harder.  I really like straight line quilting and the texture it adds to a quilt but I didn't want straight straight lines, you know what I mean?  I don't remember if I saw something that inspired me (probably) but I ended up playing with the idea of curved straight lines and a ripple effect.  I just kept drawing different things until I hit on a combination that I liked.  Check.


Now how to execute that?

I numbered the ripples in the order that I drew them and then started with the first one.  I used to plate to get a nice curve and then quilted that line first, then the ones inside of that.  Next, I quilted bigger and bigger circles until I was where I wanted that ripple to end.  Now comes the part where I ran into trouble.  My second biggest ripple was at the other end of the quilt and even though I spray basted, I didn't feel like I got a great "lock" on all the layers. So when I started quilting the second ripple, I just knew that I was going to end up with a bunching and puckering in the middle. NOOOO!!!  Not on this quilt! This quilt that I already loved, that I hard worked so hard on, that I had used precious scrap fabrics for!!!!  At this point, I am trying not to cry.  The husband looks confused, but knows enough to just tells me it will all be okay.

Okay, regroup.  Deep breath.  How was I going to fix this?

I marked where I wanted my curves to end for big ripple at the other end.  Then I went back to the side of the quilt I started with and began to fill things in based on my pattern.  I did  A LOT of smoothing and tugging, but in the end, there was only one teensy little pucker.  A huge sigh of relief.


Binding


So for once, I knew exactly what I wanted to bind my quilt with, black and white stripes.  I have seen both Rachel and Rita do this with low volume quilts and love the look.  Trouble was, I couldn't find any!  I even made a comment on one of Rachel's blog posts, to which she kindly responded, unfortunately to say, she had no idea where she had gotten it!  Hmmm.

I headed out to trusty and giant Fabric Depot to find something.  I came home with a mostly black print with white script text.  I was feeling good.  It got the binding cut and sewed on.  I was feeling less good.  It was SO black.  But since this is how my creative process tends to go:


I forged on with the hand stitching.  I think I was about halfway through when I just couldn't take it anymore.  I didn't like it, AT. ALL.  Let the ripping commence.  And the hunt for something new.  I was down in Eugene visiting my dad so I went to a local store there.  It's a tiny little place but has a decent selection of quilting cottons.  I found this checkered pattern and decided that it had the element I was really looking for: equal parts of black and white.

Round 2 of binding went smoothly and Voila!


Love!

It makes me happy every time I see it at my desk and even happier when I pull it onto my lap, over my shoulders or drag it into a meeting room! Oh like right now :)


Tuesday, December 10, 2013

Craft Show Quilt Finishes

Four Quilts!


That's right, I finished four new quilts for the craft show.  Most of them you will recognize from here and here, then there is one that just sort of snuck itself in there.  They are all for sale in my Etsy shop, so if you see one that you just have to have, you can!

Elephant Quilt

I am beyond tickled with how this one turned out!  After so much hymning and hawing over how to quilt it, I ended up going with "organic" straight line quilting roughly 3/4" apart.  Despite the density, it is actually some of the easiest quilting I have done.  Not marking anything helps make it easy plus the fact that you aren't actually trying to get the lines straight!


The quilting just adds so much to this simple design!


Chevron Quilt

I think I have a thing about not being overly thrilled with blocks and quilt tops.  I have to say, for all my foot stomping, this one came out darn cute.  I ended up leaving the quilting minimal and only adding a few additional lines in some of the white zig-zags.


Granny Square Quilt

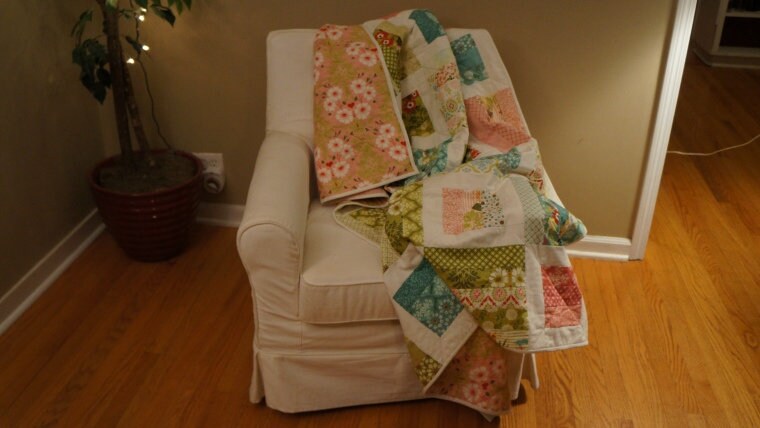
I love this quilt.  I came together just like I was hoping it would.  This was the first time that I have ever stitched binding to a quilt completely by machine and I am very pleased with the results.  I did simple diagonal quilting lines, pretty widely spaced and used a lilac colored thread.


You can almost see the zig-zag stitch that I used to attach the binding to the front.
I was hoping that if things were just a bit off, the stitches on the back would get
 lost in the pile of the fabric. Check!

Do you see my cute little tag at the top?  They came out very much to my liking.


Briar Rose Plus Quilt

I was pretty excited while I was putting this quilt together but it didn't really turn out like I was hoping.  I wish that I squared the top up a bit before sewing the backing on and I am thinking that it probably needed at least a mini border.  The minky blankets don't have binding which takes away that nice, unifying edge.  When I edge stitched the whole thing that certainly helped, but still isn't quite enough in my mind.  At any rate, I love the fabrics and the fun plus design, so I am still happy with it.


Which one is your favorite?

Thursday, November 14, 2013

Hidden Stars Quilt

Remember this UFO?


This quilt was by far the closest to being done out of all the UFO's on list (you can see the full catalog of UFO's here).  

A Bit of Backstory


I was making this quilt for one of my aunts that had not so subtly hinting that she would like a quilt from me.  My aunt Connie is an awesome lady so I was happy to get started on something for her.  Connie is an artist and likes to paint with a lot of bright, bold colors so I knew that I wanted to factor that in to my fabric choice.  I ended up going with Cuzco by Katie Spain.


I bought a Layer Cake since there were so many good fabrics in line and headed straight for my pre-cut quilt pattern book.  There were a couple of things that I really liked about the Hidden Stars pattern.  One was the finished size, 50" x 60", quick and manageable.  Second was that I felt like it would really allow the saturated colors of the Cuzco collection to shine.  I choose a medium grey for my stars and got cutting.

The top went together pretty easily and quickly.  I was really pleased with how it turned out.  I chose a bright teal that has a tone on tone pattern and mostly reads like a solid (in the above photo it is the bottom print third from the left) for the backing.  I also picked a fun multi-color variegated thread for the quilting!  

My quilting plan was to just outline each element.  As an added bonus, the different thread colors really came to life against the solid grey stars.  I made a pretty good push and got about a third of the quilting done and then my motivation. just. ran. out.  


A New Kick in the Pants


An impending trip to the east coast finally spurred me to action.  I was going to Lake Placid, NY for a week for a work trip!  As soon as I found that out about the trip I knew I would be staying a few extra days to see family.  I was really happy when I found out that people were actually going to travel in from around the state to see me.  This included my Aunt Connie.  What could be better than getting to give her the quilt in person !?!

So I picked up the quilt and set back to work.  Once I finished the quilting, I thought, “Shoot, I don't have any binding fabric, and if I do, I don't know where to look for it.”  The trip to Fabric Depot was quick but then I realized that I two nights at the agility barn ahead of me, then Wednesday night I would need to pack for my Thursday morning flight.  Hmm, when was I going to bind this quilt?  

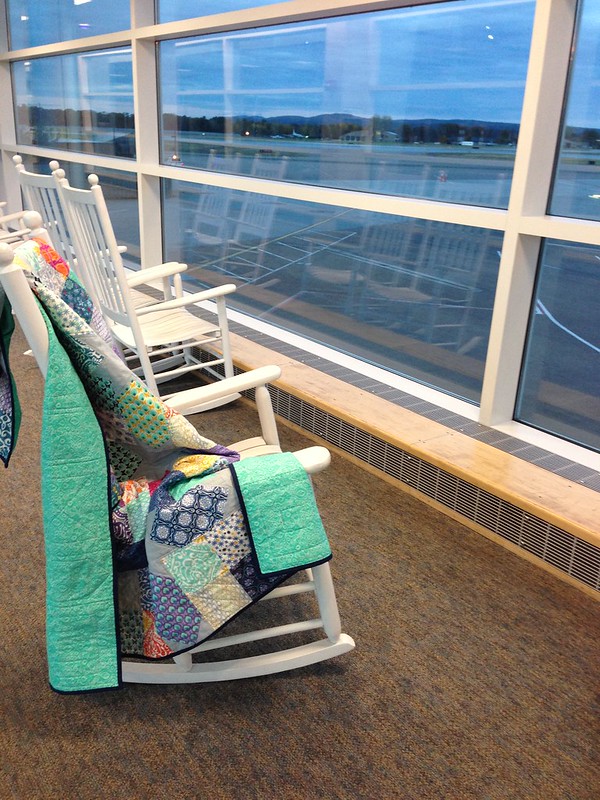
I managed to get the binding cut out and sewn together on Wednesday night and then at 5am on Thursday morning I got it stitched onto the quilt, eek!  After having carefully inspected the TSA website, I was pretty sure that I could get embroidery scissors, needle and thread on the plane :)


It was cramped quarters but sewing the binding sure made my six hour flight Dulles go by quickly!


P.S. My aunt was TOTALLY surprised and absolutely loved it!

Tuesday, November 12, 2013

Big, Bright Granny Sqaures

Ahh!

There has been so much going on that I haven't been able to keep up.  The good news is that I have been sewing and getting things done!  I have lots that I want to share and I will start with this post, which sadly I began more weeks ago than I like to admit, so without further ado, here is a start to all things I have to tell you!

Non-existent Tote Bags

As I mentioned before, Jolene's blog was the first that I stumbled upon when I found her Granny Square tutorial.  I loved the design and periodically checked back to see what she was up to.  I am often inspired by her work and I have linked to a couple of different photos of hers in my Hopscotch and Onto the Next posts.  I didn't officially start following her blog, or any blogs for that matter, until after I started this one and discovered Bloglovin' (which I really do love, BTW).

I had purchased some small cuts of really brightly colored fabrics thinking I was going to put them into tote bags like these with different patchwork designs.


But, as so many things go with me, I was bored of making tote bags pretty quickly and they never came to fruition.  So I had these great fabrics and this awesome pattern, why not put them together?

I don't have any fancy quilt design software so I either draw on graph type paper and color with pencils or, if the design will allow, as this one did, use Excel.  Nerdy, I know.

Here is what my “sketch” looked like:


I couldn't put the blocks on point like I planned, but all
the color combos are there, which is what I was going for.


Working Away from Home


Before the Nicholls State game my dad asked if we would stay in Eugene on Sunday to help him put in a window.  By this he meant, would the husband help him put in a window, leaving me to entertain myself save the intermittent calls to "come hold this." So I made darn sure that I wouldn't be bored.

My dad was quite confused as I re-arranged a portion of his living room, but I came up with a pretty good set-up.  My ironing board was a TV tray with a towel on top so I was glad that I was working on small blocks. 


Yes, there is a dog hiding under the table.


Whilst my father commenced cutting a hole in his house, in his pajamas, I might add, I started sewing.  


I got a good system going and before I knew it, viola! All my blocks were done and looking quite bright and fun, just like I wanted!


Finishing Up


I added the sashing and finished the top in the next few days.  It turned out so stinking cute! 


I was surprised how close I got to my original design.


A close up of one of favorite blocks.


I have some fabulous Cuddle fabric for the back so I nervously tossed in the washer/dryer to pre-shrink.  Hooray!  It came out perfect so I gave it a good ironing.

Love the color of the Cuddle fabric for the back!


 This is going to be my foray into spray basting since I haven’t had any luck pin basting Cuddle.  It’s a love/hate thing me and Cuddle have going on.  In addition to that I have to decide on a quilt design . . . wish me luck!

Friday, September 13, 2013

Onto the Next

Quilt for Me, Take Three


After lots of internet and fabric store searching here are the three finalists to go in place of the defunct Jitterbug quilt (you can read all about that here and here).  And maybe, just maybe, I have already acquired the fabric and patterns to make ALL of them . . .

Pastels in "Window Pane"

This pattern:
I love, love. love this quilt! By Janet.  You can visit her shop here.
I don't actually have a pattern for this but I have seen this design and variations on this design several places.  The above photo just happens to be my favorite example.  The only drawback is that I don't really like square quilts and in order for the design not to be weird, it needs to be square.

This fabric:

I am super taken with this weird pastel + black palette right now.


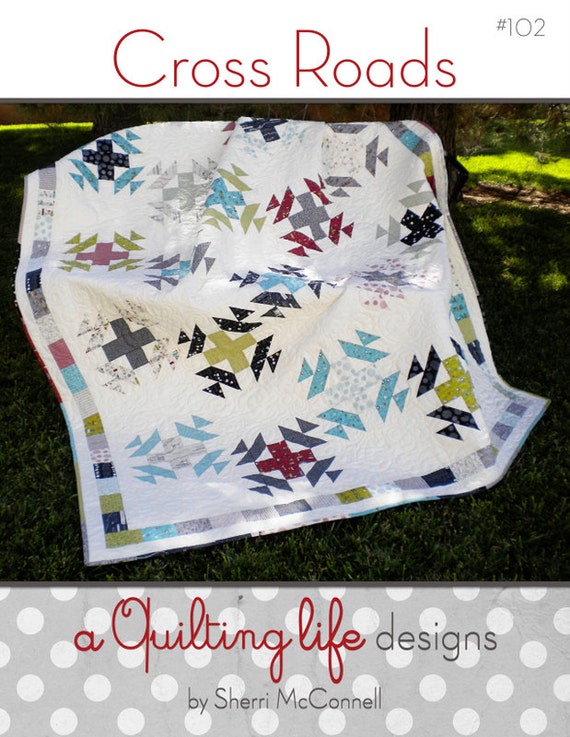
Cross Roads in Tsuru

This pattern:
By Sherri McConnell. You can visit her blog here.

I have been wanting to make a plus quilt and I want to conquer half square triangles, so this is a pretty good option.  When I saw this pattern at Fabric Depot, I put it in my cart right away :)

This fabric:


Sunrise in Berry with a Hint of Citron

This pattern:
From the book Modern Basics II by Amy Ellis
I really like this quilt (again, very much like a plus quilt) and have been collecting fabrics in the below colorway for a while, but I am just not sure it's my winner.

This fabric:


I want to use a variety of low volume fabrics in the background.
I am hoping for a similar effect has this quilt.

I keep hymning and hawing over what will be the most fun to make AND I will be most excited about actually finishing (meaning sometimes tedious things are worth the effort).  Open to thoughts, suggestions and voting . . . 

Thursday, September 12, 2013

Quilt of Honor Top

My New Team

Is super awesome!  I love being part of the local Portland Etsy team, and being able to get together in person and talk shop.  However, despite my efforts, I have not been able to find another quilter on the team. (If you are out there, make yourself known!!!)  Quite frankly, that is what all my questions are about, quilting and selling quilts.  Enter the Quiltsy Team :)

Okay, so I found these ladies intimidating when I looked at the requirements to be on the team but I really wanted to ask quilting questions, so I wrote up some shop policies and forged ahead.  I was gleeful when I got the message that I had been accepted onto the team!!!

And of course, there wasn't anything to be scared of.  Everyone was so friendly and welcoming.  Also, SO. MUCH. TALENT.  To learn more about the team, you can visit our blog, here.

A Call to Action

A discussion thread was posted to the group on August 11th asking for help making five quilts to be presented on September 11th to a group of veterans that were being honored at an event in New York state.  A month was a short timeline to be sure.  BUT I really wanted to help and a fellow team member had offered to quilt and bind a completed quilt top, so I said I would make the top for her.  Eek, this is exciting! Quick like a bunny, not time to waste on this one!

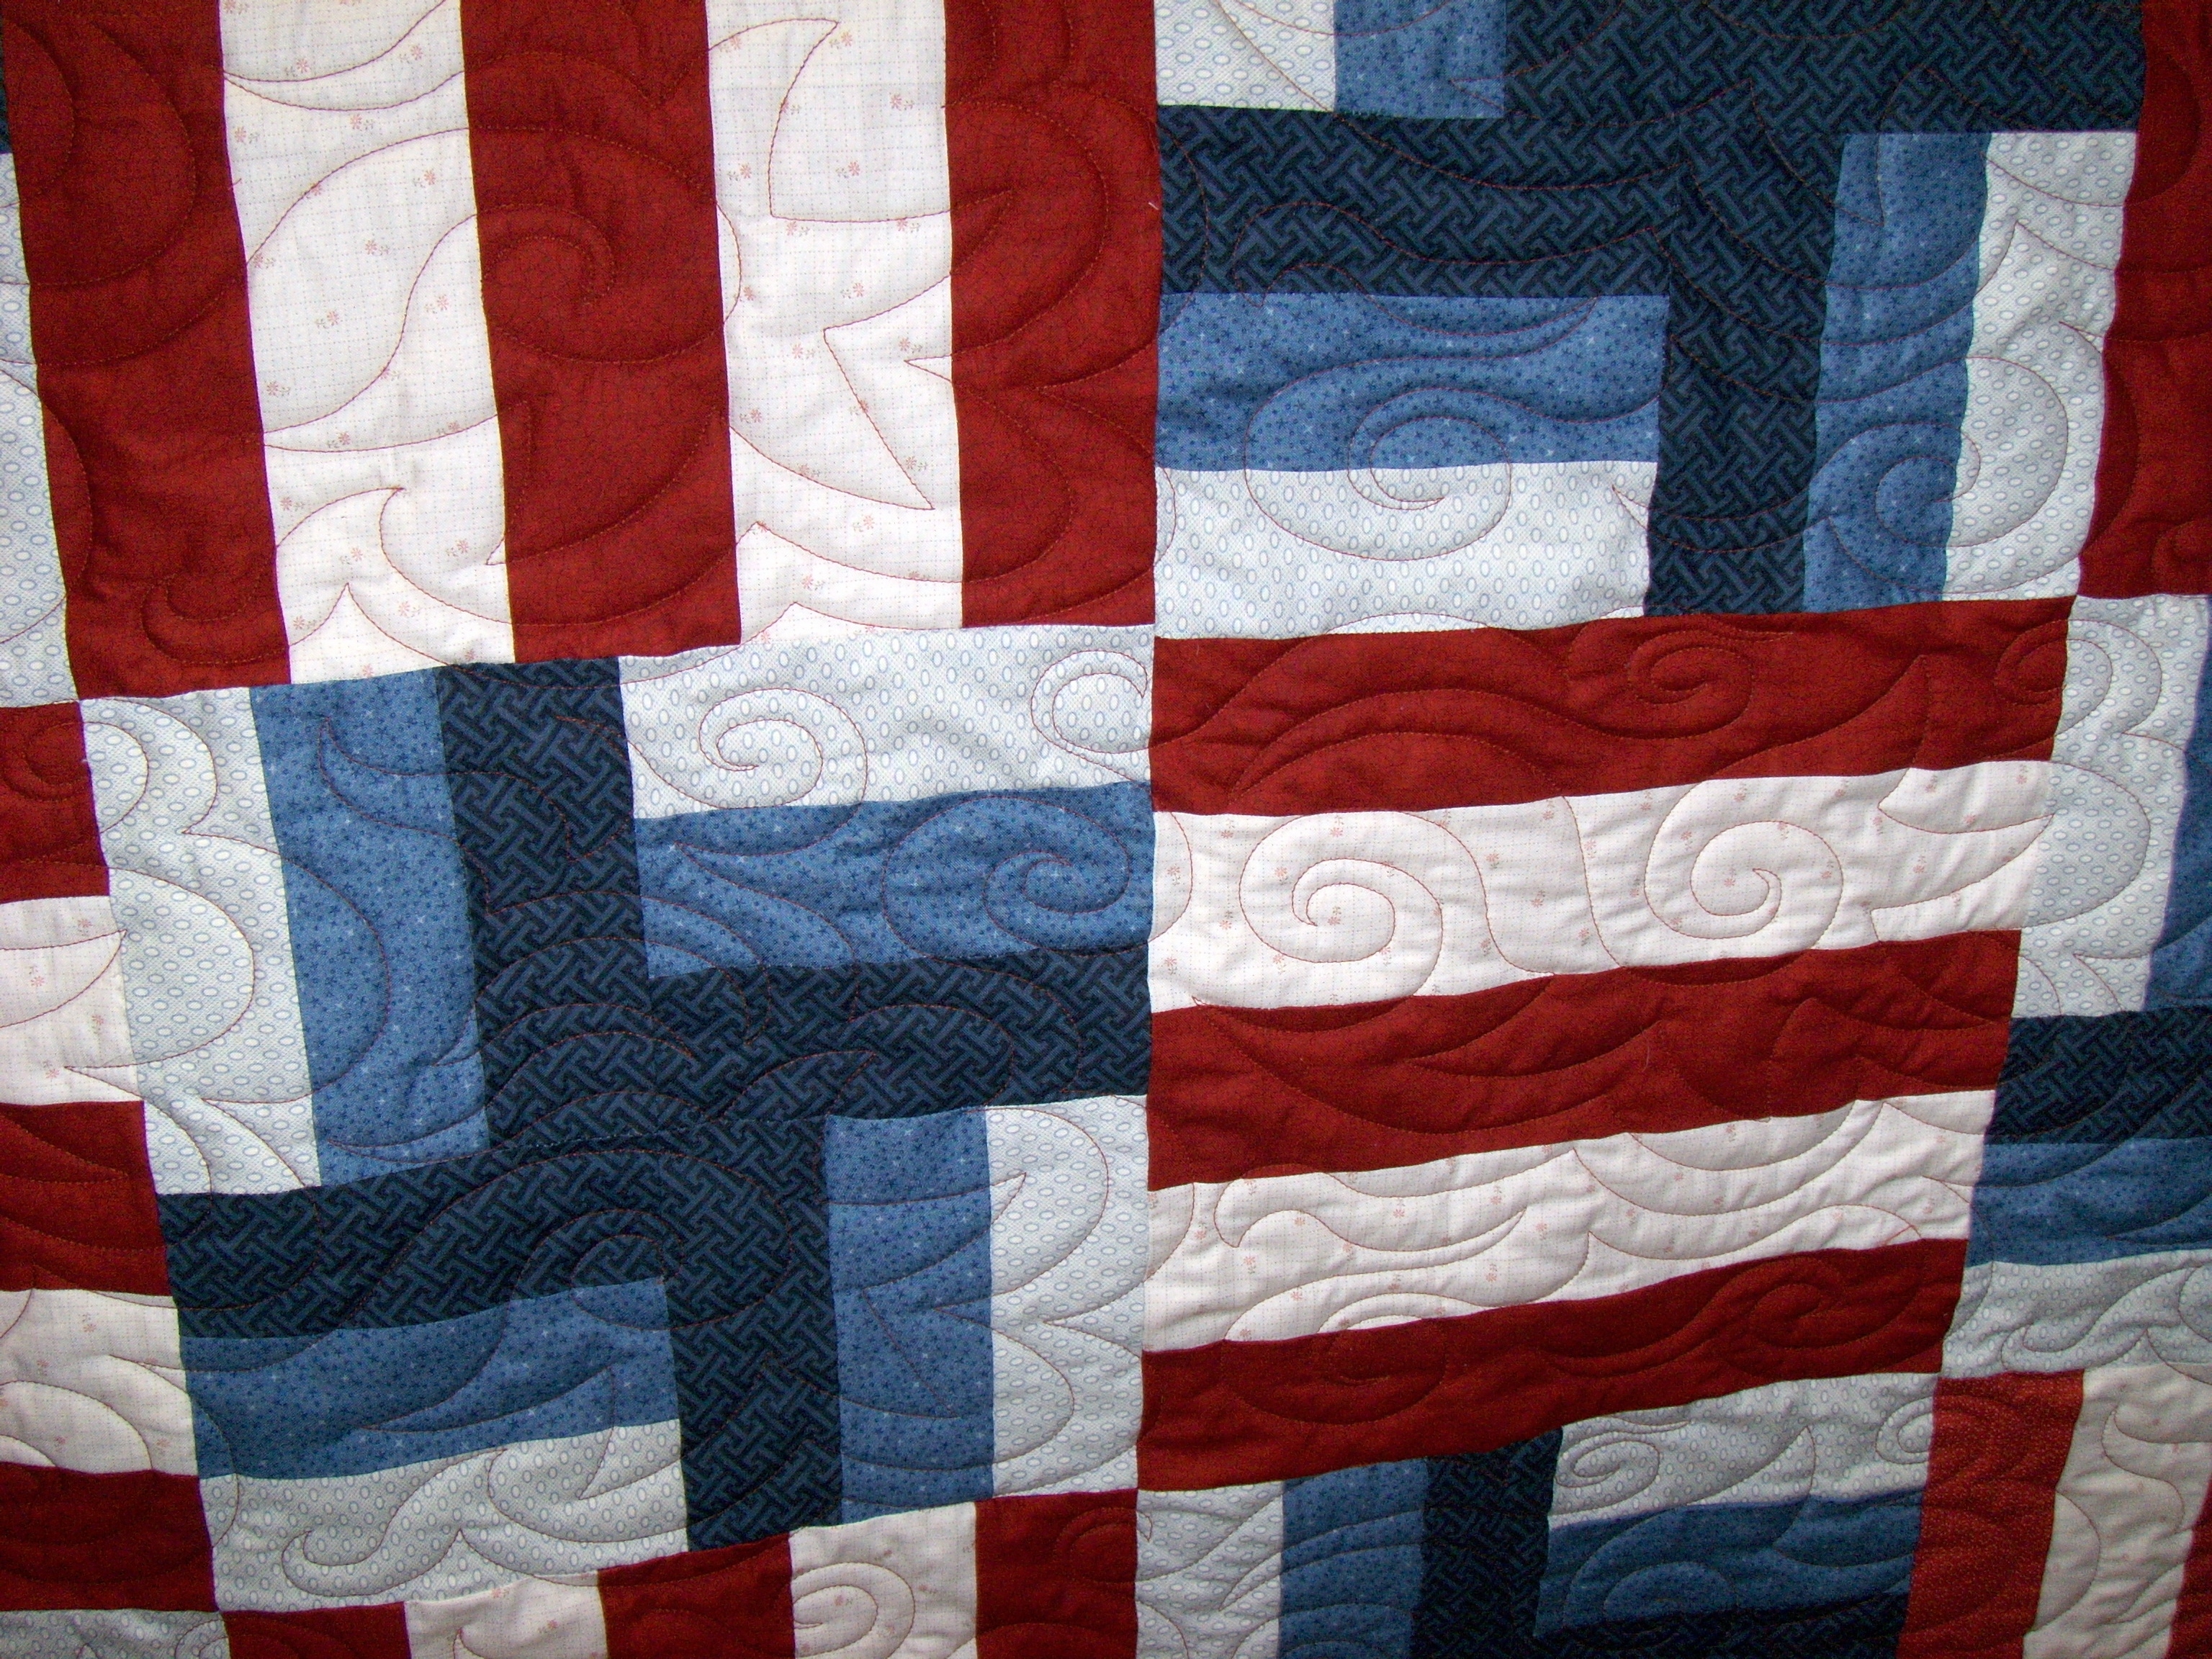
Quick Quilt Top (that I can still be proud of)


I really liked the idea of sewing something from my stash and was surprised how much red, white and blue fabric I have (mostly thanks to my mom and all her good garage sale finds) but the idea of trying to do something scrappy and improvy seemed like too much for the short time frame.  I decided that I would see what I could find on Pinterest.  You can see all of the ideas I gathered here.

In the end I decided on a variation of the quilt below.


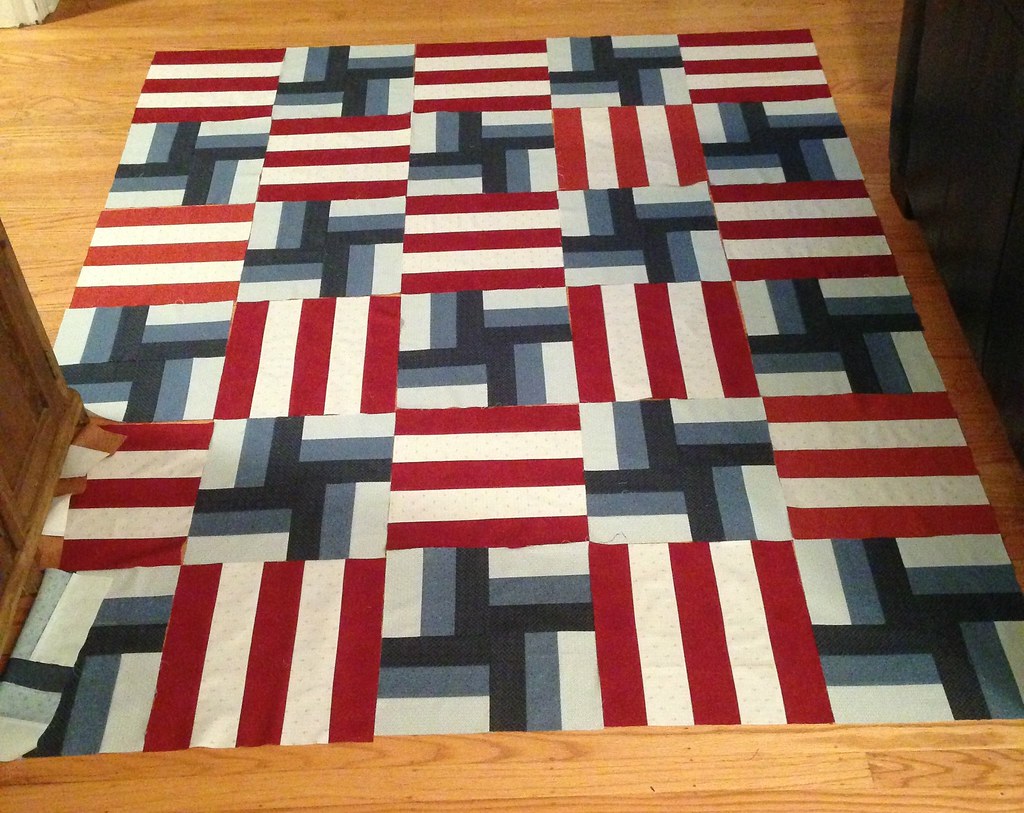
If you look closely you will notice that the strips aren't actually full rectangles.  They are a little wonky, but in a very specific way.  The pattern called for a template ruler which meant individual pieces, which was a no-go in this situation.  Luckily, I have done a few other variations on rail fence.

A purple skull quilt for my mother in law:


A pink quilt for my Nana's pink house:


and I knew I could achieve a very similar effect with regular old strips AND at blazing speed.  Off to Fabric Depot!

Let the cutting commence!


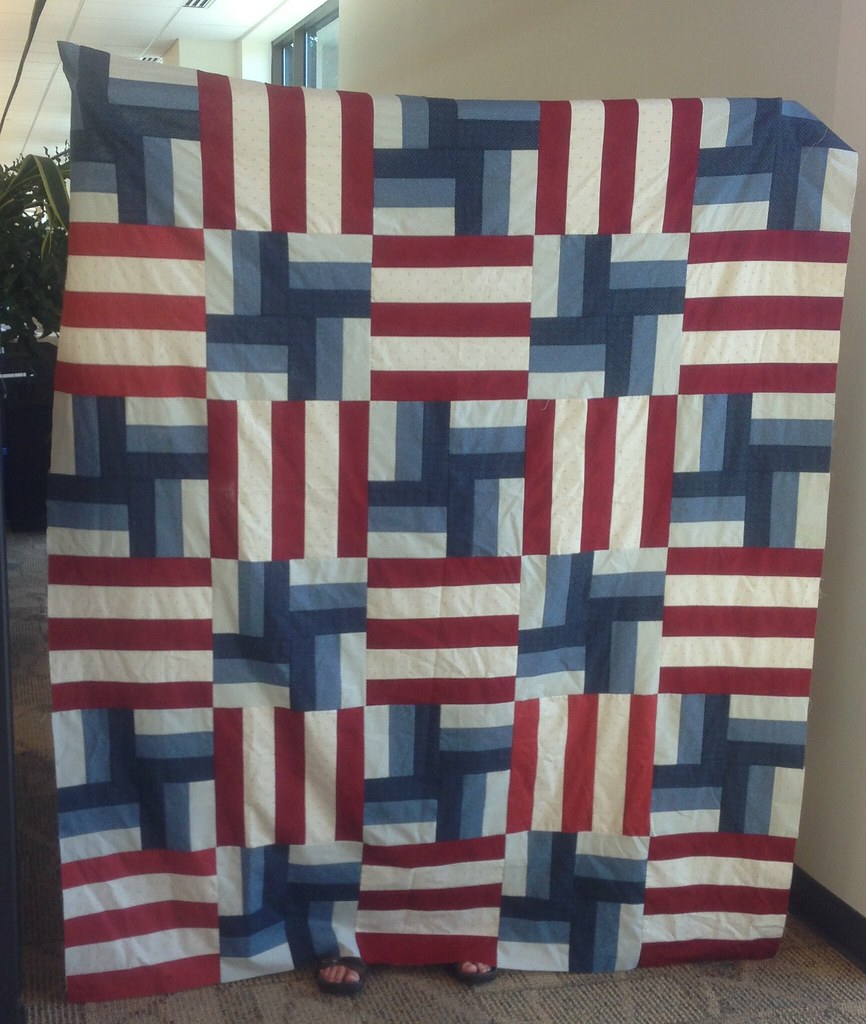
This quilt top went together beautifully!  And quickly, just three evenings!  After all the trouble I had with my Jitterbug quilt, it was so nice to have all my blocks line up and seams match!  See, I told myself, you do know how to do this. I have also learned the importance of squaring blocks after sewing them together.  Ah, the fun of being self taught :)  Thanks to all my unknowing internet guides and teachers I am slowly filling in the gaps in my quilting know how.

And here it is!

The blocks all laid out before being sewn together.

A quick snapshot before being mailed off!


I sent it off to Vivian in South Carolina to finish!

She turned it around in just a few days, amazing.  Her quick snapshot before it was in the mail once again :)


At Last!


This project was super duper top secret so I couldn't share before the event.  Finally the day was here! I was so excited to see the below photos from last night!

A shot of the quilt tag, with my name on it!


The quilt and recipient :) So awesome!!!