Showing posts with label Denyse Schmidt. Show all posts

Thursday, December 28, 2017

Fireworks Quilt in Chicopee: A Finish

So the real reason that I wrote my catch-up blog post was as an intro for this post. I refuse to be that person and leave a cliff hanger in the blogosphere, no matter how delayed this post is. I am recording here, for posterity and the blogosphere that I did, in fact, finish my Fireworks quilt.

Now on to the fun bits. And by fun bits, I mean pictures. Well, that and my internal monologue.

Finally Finished

I love this quilt and it was a labor of love to bring it to fruition. I was so excited when I finally got the top done, but then things didn't really continue to click along like I hoped. As usual, I changed my mind and second guessed myself...

The Backing

If you can remember back, oh so long ago, I shared this plan for backing it binding.


BUT, the backing just wasn't doing it for me. I REALLY wanted to back it with a Chicopee fabric, but it had been so long since the line came out, I wasn't sure that was going to happen. I searched around on Etsy and there was some Chicopee fabric out there, but I just couldn't commit to anything. I eventually went to one of the smaller quilt shops in Portland, knowing that they rarely order full lines of anything, but since they do less business, often have things from older lines. I was in luck! I got a good piece of the blue and yellow paisley. I was going to need to stretch it though and opted for some solid shot cottons to compliment the other colors in the quilt. I tinkered quite a bit before landing on my design. It would look something like this:

The little quarter squares would be made from Chicopee scraps.


The Quilting

Even more than the backing, I was stuck on what I was going to do with the quilting. So I did something that I often do when I have a quilting dilemma, I Googled it. Looking at pictures of other completed quilts in the same pattern helps me see what different options will look like since I don't have any fancy software skills to mock things up. However, in this case, even though the pattern has been out for a long time, there are not a ton of photos out there of completed Fireworks quilts. Also, most of them that are out there feature free-motion quilting. I knew I wasn't up for tackling that on something I couldn't bear to "ruin" with sub-par quilting. However, I also knew that I wanted something with a little bit of movement without being too busy. There was already enough going on e with the fabric and the pattern. When I was bemoaning to myself that lack of finished Fireworks quilting options to peruse, I had a flash of an idea. I could look at Swoon quilts instead. Now if you a quilter you know that this pattern had a tight grip on the quilting community for several years so there are a lot of completed Swoon quilts out there. Swoon is by the same designer as Fireworks and is a similar large surround pattern. During my search, I stumbled on to a photo with a pattern like this and knew that was the direction I wanted to go.

A poor drawing, but enough to see the idea.


And I was off!

One of the few projects that I completed in the upstairs craft room.


Finishing

I actually used the binding the I originally picked out. I was nervous about the bright color but I think it turned out perfect with the grey background. Did I mention that I love this quilt? Cue gratuitous number of photos.

Of course Fractal had to make an appearance at the edge of the quilt. I like how much the quilting stands out in this photo.


I am so pleased with how the back came out. Totally worth the fabric hunt.


You can see some tiny puckers in the quilting here, but you what? I have never noticed in the year since I took this photo.


And there you have it, a finished quilt. All documented and everything :)


Friday, June 12, 2015

Hope Valley Pinwheels: A Finish

DONE!


Wow, I never thought it would happen. While I will admit that it isn't my favorite quilt, I do feel that it has a certain charm to it.


The pumpkin binding really does work well. I am glad that I stuck with it. Thanks to all of you who gave me the extra vote of confidence!

Please excuse the dog toy. It was so bright that I couldn't see anything in the view finder and this is the best shot I got!

So bright!

I finished the binding with a zig-zag stitch. This is becoming more and more common for me. I love the extra durability that it gives and how flat it makes the binding lay. Also, with the baby, I just don't have as much "sit around and hand stitch time" as I used to. He was kind of enough to take a long snooze so that I could finish.

I even remembered to add a tag! That never happens!
This quilt is listed for sale in my Etsy shop.

Linking up!
Confessions of a Fabric Addict
TGIFF
Richard and Tanya Quilts


Wednesday, May 27, 2015

WIP Wednesday: Hope Valley Pinwheels

As I mentioned last Wednesday, I have a couple of smaller quilt tops in the queue for quilting that I want to finish before tackling my bigger quilt tops, Fireworks and Hopscotch. I made pretty good progress, but am not sure when I will get more sewing time again before heading off to my first agility trial since February. Squee!!! I know Dexter will be one happy dog!

Stuck at home, doing nothing, makes for a very sad boy.

One of the hardest parts of being a new mom, for me, has been feeling like I am letting my two fur kids down. Dexter has been quite depressed and Fractal is going stir crazy. It has been very hard for me to watch,especially when I am stuck in the glider nursing the baby and can literally do nothing for them. I know it is not as bad as it is in my head since they have had trips to the dog park, one class, a journey to a friend's house and Buddy plays with them regularly in the backyard. But still, nothing like what they had pre-baby.

Pinwheels


I can't believe it, my pinwheel blocks are going to make it into a finished quilt. I am in shock really. These have been sitting around for so long and I was at such a loss for what to do with them that I was pretty sure they would never amount to anything. Which bummed me out severely since I had made them from precious Hope Valley Fat Quarters won when my mom and I saw Denyse Schmidt at a local quilt store.

The first pinwheels I sewed. . . in 2012!

In the end, as it always seems to be, the answer was to keep it simple. Really simple. I just sewed the squares together: no sashing, not setting on point, nothing.  Originally, I had really wanted to do a very modern, non-grid layout with these very traditional blocks, but it just wasn't mean to be. Mostly because that would have required more blocks and I have no interest in making any.

The odd number of blocks I ended up with before quitting.
I managed to talk myself into sewing one more to
make it an even 20.

I was really nervous when I went to get backing for this quilt since I knew that there was no way to get something from the Hope Valley line. My thinking was to do a shot cotton since to me they have bit of that worn vintage-y look like the Hope Valley prints. Instead I ended up with a plum and orange print for Denyse's new Franklin line (which I like quite a bit).

It is very helpful that designers often use the same color palette from one collection to the next.


Again, I went simple with the quilting. The plan was a one inch grid, but after getting all the vertical lines done, I felt like adding the additional quilting would be too busy for the small quilt. So I called it good.


All that I have left to do is bind the darn thing. I have this pumpkin colored Kona for the binding, but I'm not totally sold on it, so I have working on quilting my Bento Box baby quilt instead.


What do you think, should I just go for it with the binding, or could I do better? Something a bit more unexpected perhaps?

Linking up with WIP Wednesday and Let's Bee Social!

Wednesday, May 20, 2015

Fireworks Quilt: Work in Progress

A Completed Quilt Top


Squee! It's finally done. Well the top is done. All 880 pieces. It is pretty glorious and I am very proud that I stuck with it. This project started a very long while ago, you can read a bit more about it here. I definitely got better at flying geese as I went and I learned the value of ironing without steam, which as a steam-a-holic, was a big deal for me.

As you can see, my points turned out pretty good.


I took the last few days before Tate was born off from work. I was scheduled to be induced on a Tuesday evening and decided the Friday prior would be my last day. If I was going to have to be induced, which I totally didn't want, I was at least going to take some time to myself before it happened.

It was totally worth it because I nearly finished all my in progress quilt tops! Meaning that I have six quilts waiting to be quilted. Oh boy.


Yesterday I made my first trip to Fabric Depot since Tate was born. They were having a good sale which I wanted to take advantage of since I needed a lot of fabric for quilt backings and bindings! Here is what I came up with for the Fireworks quilt:

Since I feel like the quilt is a little dark overall, I wanted something lighter is value for the backing.
The plum chevron print will be great on the back and I am going crazy with the
bright citron for the binding!

Now to decide how to quilt it. I hope it doesn't take me months and months but realistically, I will quilt my smaller quilts first so it may be a bit before I get to count this one completely done. For now, I will just bask in the glory that I no longer have any little pieces hanging around waiting to make their way into quilt tops!

Linking up with WIP Wednesday and Let's Bee Social!


Thursday, October 16, 2014

Fireworks: A New Project

Challenges


At this point in my quilting career, I feel like I have kept my projects pretty safe and straightforward, playing more with color than shape. The first real tricky project that I tackled was my Hopscotch quilt and we all know, that even though I won the round with the quilt top, I still have yet to do battle with the quilting :)

One project that I knew would be challenging, but caught my eye nonetheless, was another pattern by Camille Roskelley, Fireworks.

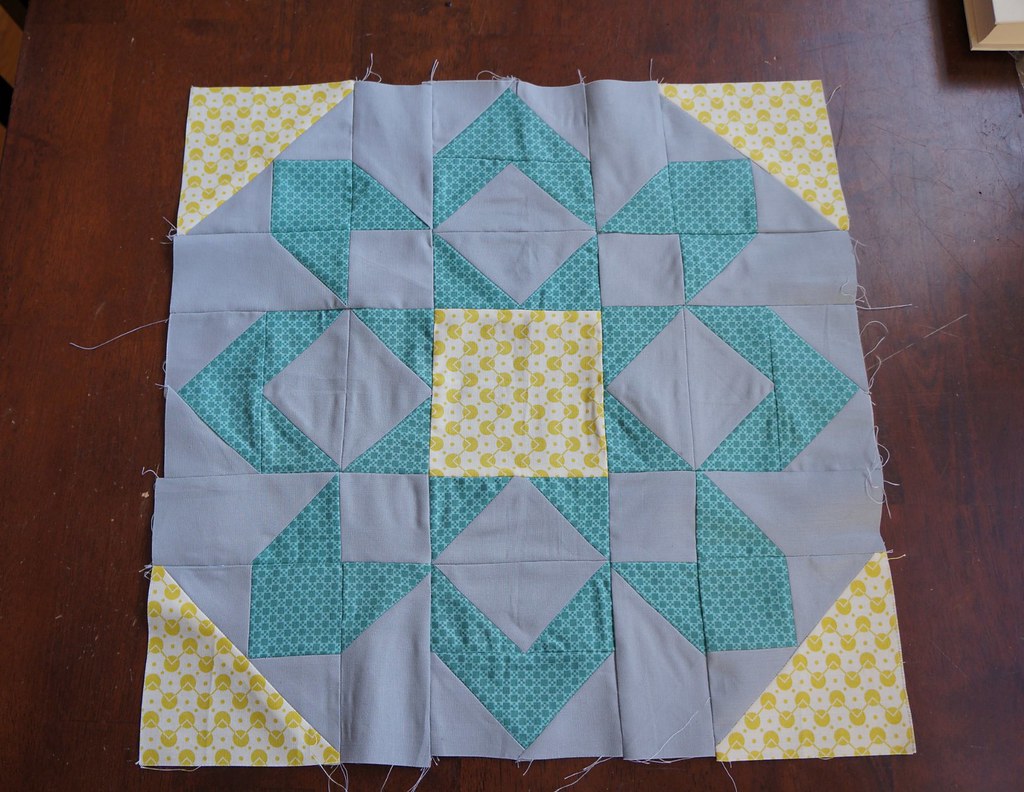
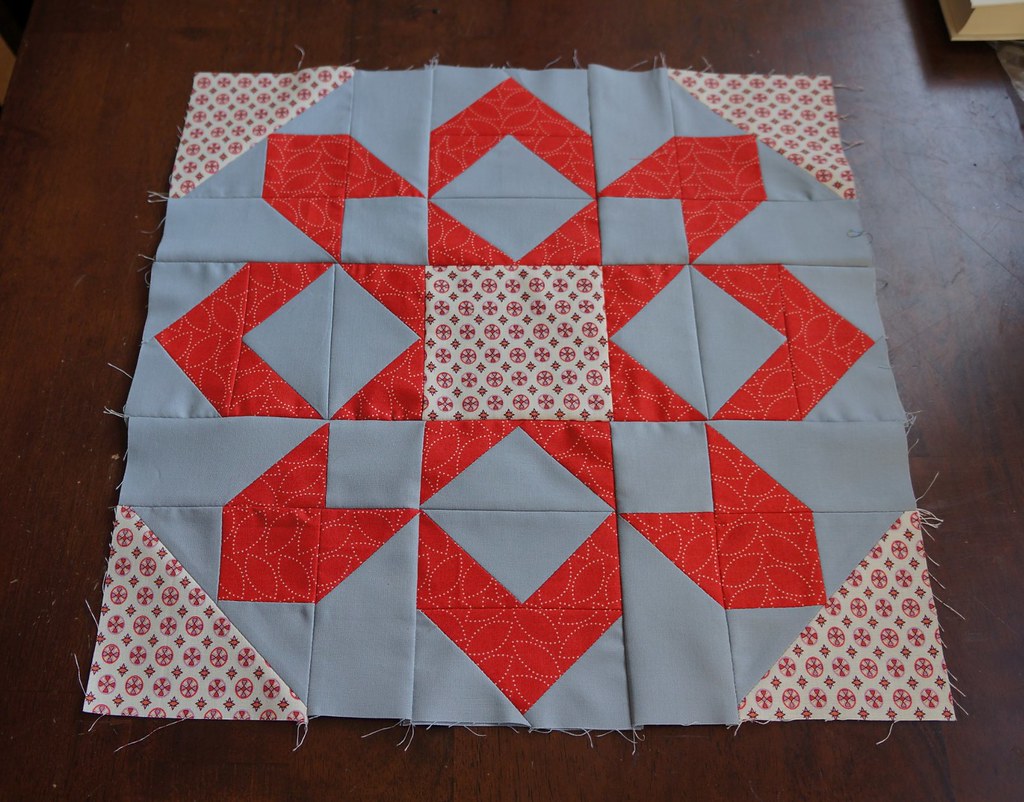
The only change I planned to make to the pattern was to make it smaller. Oddly, I have this thing against square quilts. To me, blankets should not be square, they should be rectangles. So there. I planned to make only 12 blocks so the quilt would be three blocks wide and four blocks tall.


My fabric choice also came to me right away. I wanted to use Denyse Schmidt's Chicopee collection. I had a full set of fat quarters stashed away for just the right project!


A Family Affair


I had the pleasure of traveling to Upstate New York for work. That just happens to be where my extended family is from, so I snuck in a little visit. My aunt Anna is an accomplished quilter and I knew she was just the person to help me tackle this challenge, so I made sure to pack my fat quarters and pattern in my suitcase.

My cousin and I headed over to my aunt's place and enjoyed a lovely afternoon of chit chat and sewing. At the end I had a completed quilt square! Not bad! These are by far the best flying geese I have put together and almost all the points look great. Color me pleased.

DSC08739
My first fireworks block.

Languish


As I shared in my Penny Patch post, I am not really a fan of the whole cutting part of quilting. At my aunt's, to keep things simple, I had only cut out what I needed to make the above block. On top of not wanting to tackle the amount of cutting involved in making 11 more quilt blocks containing 73 pieces each, I was struggling with my design choice. What were the best fabrics to put together in each block? Should I only use one of the color ways in the collection, or both as I had planned? Was the grey background going to make the quilt look dull? So I pondered and mulled and occasionally pulled the the fabrics out to see if I could come up with something that would make me happy.

At long last I decided that I wanted to continue to tackle this challenge. I thought the best way to get my mojo going was to make some progress. What feels like progress? More blocks! Here is my second block.


DSC08737
My second block.

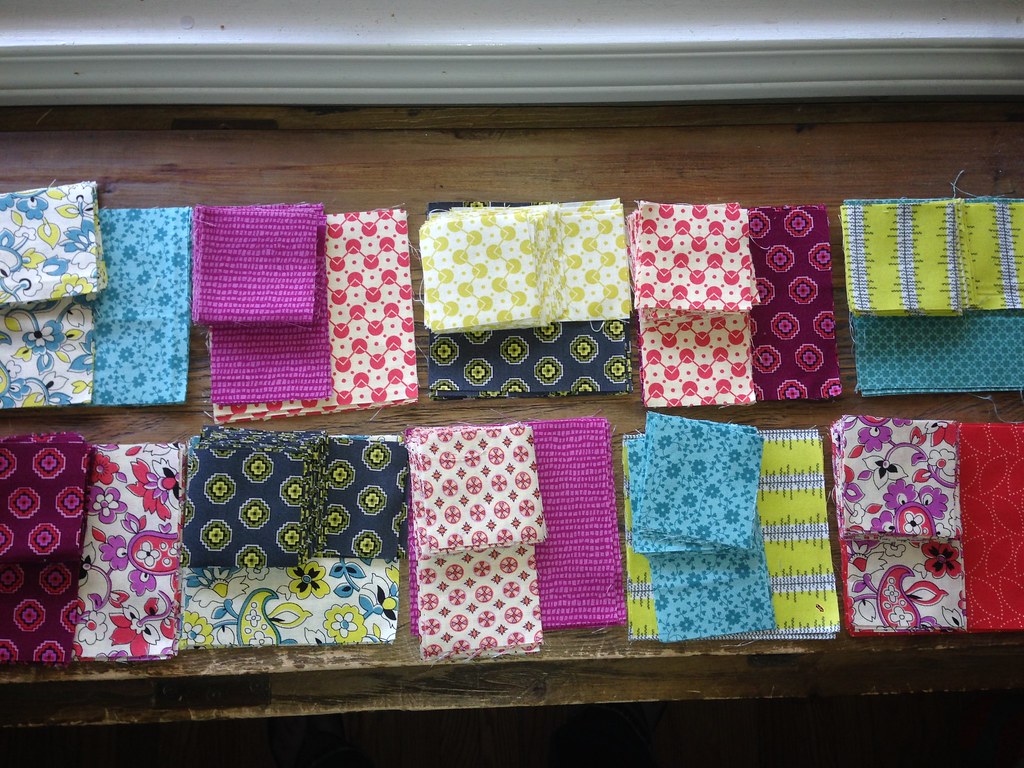
Buoyed on, I finalized my fabric combinations and got all the patterned pieces cut out.

Fireworks Pieces
The rest of the color and pattern combinations

Now all I need to do is cut out all the background fabric. Not a small task. I don't want to let this one languish too much longer, but I do have a few other things on top of my list to finish before I continue this challenge. At least now I am excited to see it come together!

Thursday, August 28, 2014

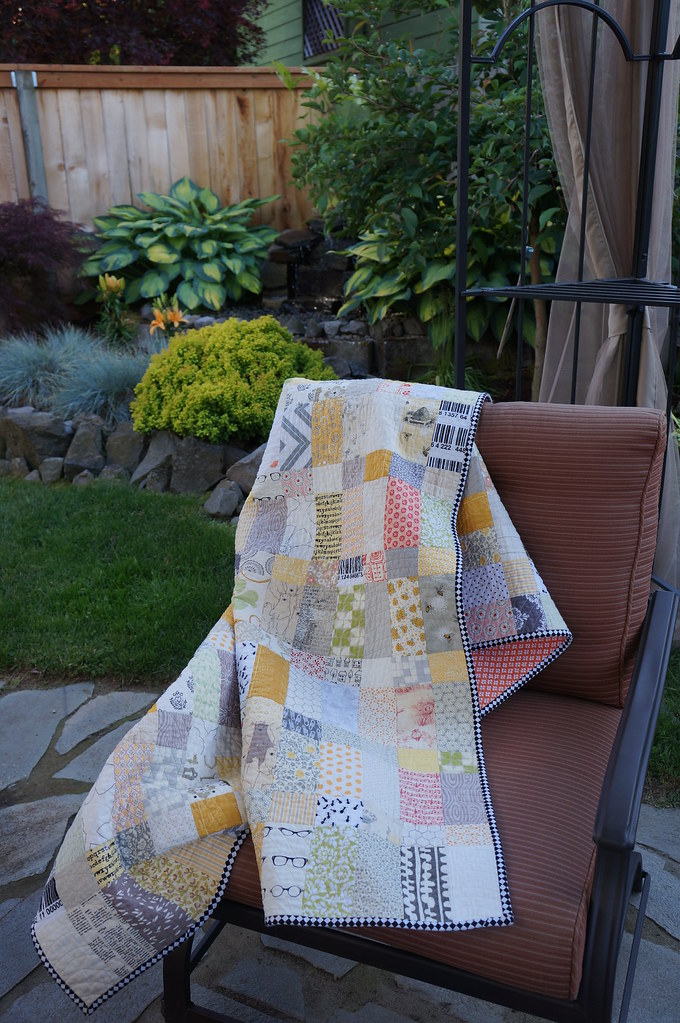
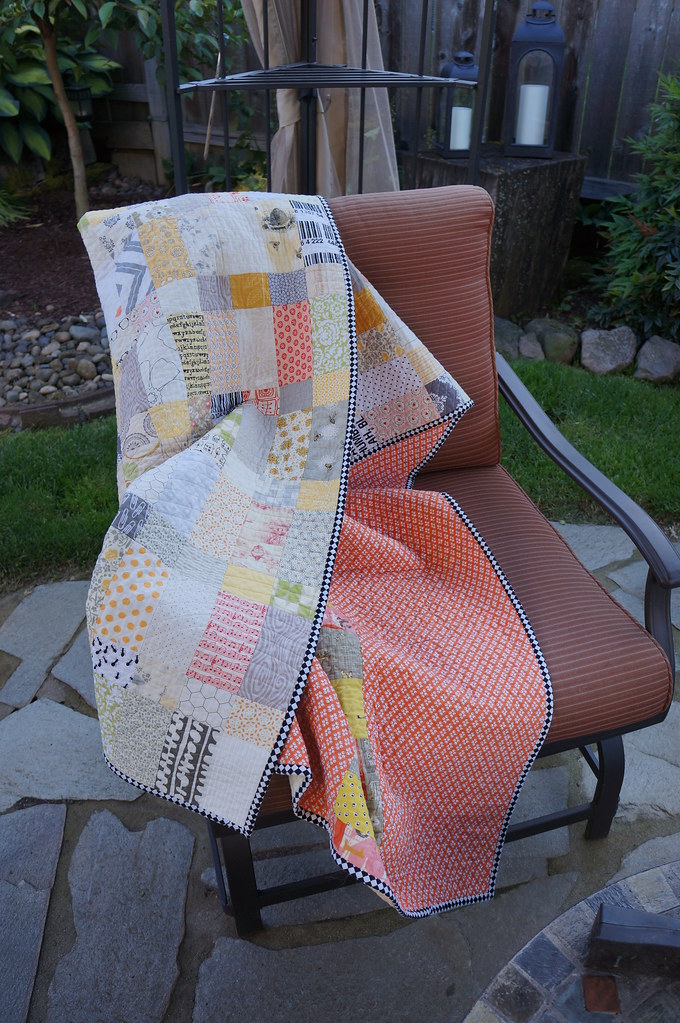
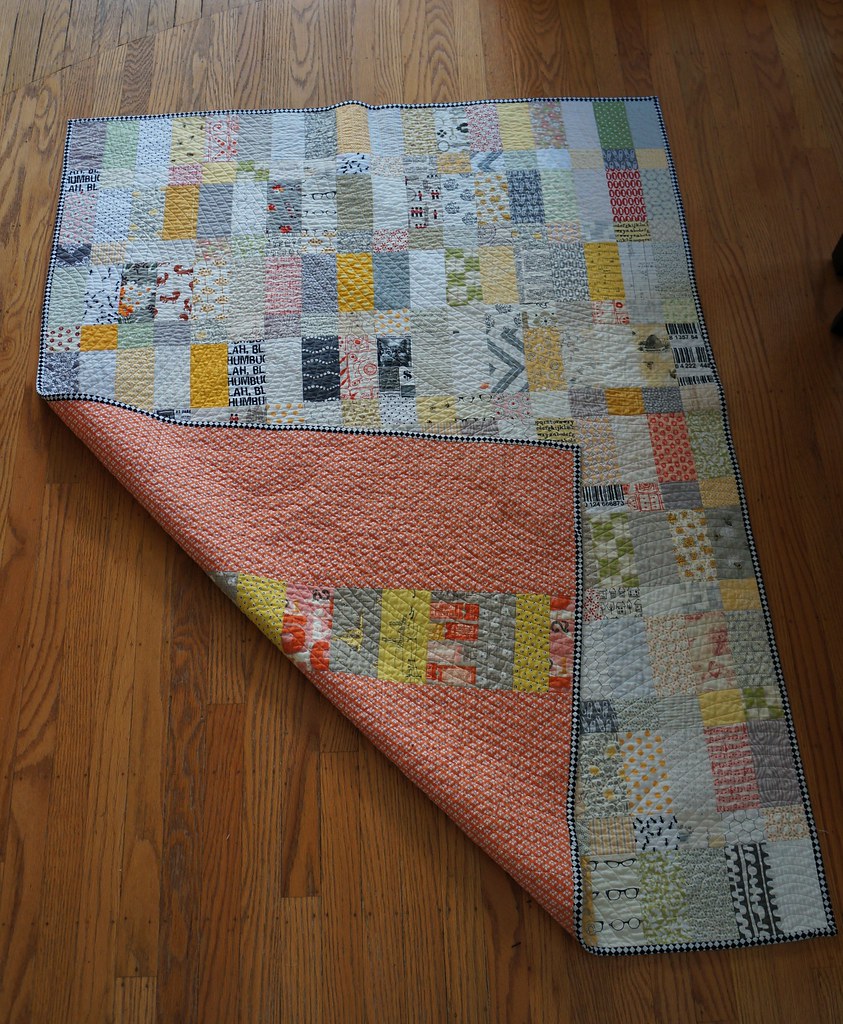
Low Volume Loveliness Complete!

Let's start back where we left off shall we?  I talked about my low volume quilt here and here.  The verdict...

I love it!


I love this quilt.  It came out perfect.  I may have almost cried a few times during the process when I was pretty sure that I ruined it, but in the end, I am over the moon happy with it!


Quilting


This was decidedly harder.  I really like straight line quilting and the texture it adds to a quilt but I didn't want straight straight lines, you know what I mean?  I don't remember if I saw something that inspired me (probably) but I ended up playing with the idea of curved straight lines and a ripple effect.  I just kept drawing different things until I hit on a combination that I liked.  Check.


Now how to execute that?

I numbered the ripples in the order that I drew them and then started with the first one.  I used to plate to get a nice curve and then quilted that line first, then the ones inside of that.  Next, I quilted bigger and bigger circles until I was where I wanted that ripple to end.  Now comes the part where I ran into trouble.  My second biggest ripple was at the other end of the quilt and even though I spray basted, I didn't feel like I got a great "lock" on all the layers. So when I started quilting the second ripple, I just knew that I was going to end up with a bunching and puckering in the middle. NOOOO!!!  Not on this quilt! This quilt that I already loved, that I hard worked so hard on, that I had used precious scrap fabrics for!!!!  At this point, I am trying not to cry.  The husband looks confused, but knows enough to just tells me it will all be okay.

Okay, regroup.  Deep breath.  How was I going to fix this?

I marked where I wanted my curves to end for big ripple at the other end.  Then I went back to the side of the quilt I started with and began to fill things in based on my pattern.  I did  A LOT of smoothing and tugging, but in the end, there was only one teensy little pucker.  A huge sigh of relief.


Binding


So for once, I knew exactly what I wanted to bind my quilt with, black and white stripes.  I have seen both Rachel and Rita do this with low volume quilts and love the look.  Trouble was, I couldn't find any!  I even made a comment on one of Rachel's blog posts, to which she kindly responded, unfortunately to say, she had no idea where she had gotten it!  Hmmm.

I headed out to trusty and giant Fabric Depot to find something.  I came home with a mostly black print with white script text.  I was feeling good.  It got the binding cut and sewed on.  I was feeling less good.  It was SO black.  But since this is how my creative process tends to go:


I forged on with the hand stitching.  I think I was about halfway through when I just couldn't take it anymore.  I didn't like it, AT. ALL.  Let the ripping commence.  And the hunt for something new.  I was down in Eugene visiting my dad so I went to a local store there.  It's a tiny little place but has a decent selection of quilting cottons.  I found this checkered pattern and decided that it had the element I was really looking for: equal parts of black and white.

Round 2 of binding went smoothly and Voila!


Love!

It makes me happy every time I see it at my desk and even happier when I pull it onto my lap, over my shoulders or drag it into a meeting room! Oh like right now :)


Thursday, December 12, 2013

Low Volume Quilt Top

Making Progress


It's all together and I am over the moon about this one.  This is the perfect for me quilt.  Plus, it looks great on our furniture, which is an extra bonus.  I love looking at all the different fabrics, there are so many favorites in there!


I was surprised how hard it was to get all the columns to line up and I struggled with it for a while until I remembered that I wasn't going to sell it and I just didn't care that much. After that, things went pretty quickly.


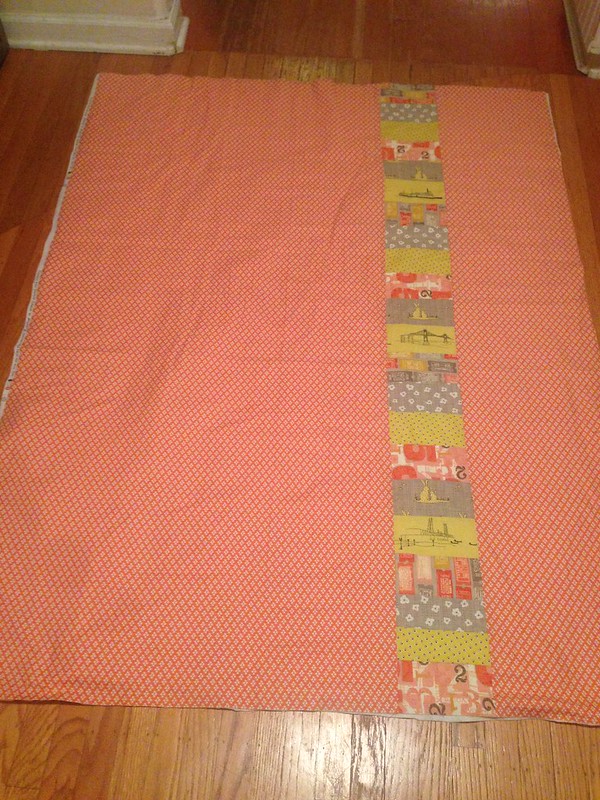
The husband helped picked out the backing (he's the best).  The main part is  from Denyse Schmidt's Florence with a long pieced strip running down it in a variety of fun fabrics (Bluebird Park, Waterfront Park, 2wenty thr3e).


Now that the craft show craziness is over, I can finish this one (and take MUCH better photos)!

Wednesday, September 18, 2013

Unfinished Business

A Confession of Sorts

The idea of starting a super awesome and fun brand new quilt for me is very tantalizing.  However, fresh off the finish of my second Lisa Lam Diaper Bag, I have found myself wanting to continue the high of finishing things.  As a result I have been eyeballing my pile of unfinished quilts.  I have quite a large pile of unfinished quilt tops and blocks.  For hopes that public declaration will spur me to action here is a complete list with photos of the current state of progress:

Mom quilt


I started this for my mom well over a year ago.
Excuse:
I don't have the skills to finish it the way I want

I really want to learn how to do free motion quilting and am close to working up the nerve to try.  I want to work on something small first, so I may take some of my Jitterbug blocks and practice on those.  They would make cute pillows, even with sub-par quilting, they themselves are sub par afterall :)

Pinwheel quilt


My mom won a stack of fat quarters of Denyse Schmidt's Hope Valley
when we saw her at a book signing. I stared these blocks the next day!
Excuse:
I'm mad at the blocks

I definitely need some work on my flying geese construction and my poor execution is one of the reasons I got mad at the pinwheels.  The other reason is that I just could NOT decide on a layout, so I put them down and never went back.


Chevron quilt


For my shop.

Excuse:
Just plain not excited

Honestly, I have never been excited about this quilt.  I made it only because I thought it would sell and I quickly learned that is not a good reason for me to make a quilt.  I am just not as motivated by money as I thought I was when I opened my Etsy shop.


Elephant quilt


Also for my shop.
Excuse:
I don't know how I want to quilt it

Originally I thought I wanted to do something loopy to add some softness and girliness, now I'm just not sure.  Again, I really want to do FMQ but in the interest of finishing in this millenia, I may do a tight grid pattern like this.

Choices choices.


Star quilt

A gift that is now well overdue, but the intended recipient do not know this.
Excuse:
It got too darn hot to quilt!

It just so happens that my craft room is the hottest room in the house and after the brother moved out, I relocated my machine out of the dining room back to its rightful home.  I had no interest in having a quilt draped over my shoulder in a hundred degree room.  But Fall is coming . . . and the husband gave me a new fancy fan . . .

Reed quilt

There are still two rows of blocks on the ground!
Excuse:
It's so big that I am totally intimidated by the prospect of quilting this thing!

Um, its. just. so. big.  I did take a class on using a quilt frame that is available to rent by the hour, clearly the best option for this monstrosity.  I just need to get motivated and make it happen.

Hopscotch


For me.

Excuse:
I'm mad at the blocks

When I laid out Hopscotch I realized that I was missing blocks, and managed to tackle that hurdle.  However, I also realized that this quilt is going to be LOUD, which normally I love . . . but, not loving it here.  I do generally go through a phase of not liking a quilt and thinking it won't turn out, typically when I get all the blocks done, so I should probably just forge ahead so I can get over it.

Phew.


Wow, I am full of excuses.  Some more lame than others.  Now that's over with, let's get on with some finishing!  What to tackle first?

Wednesday, August 21, 2013

Jitterbug Isn't Going to Make It

Resigned


Sadly, I have experienced my first complete, utter and total quilt failure.  Truthfully, it wasn't really my fault. Although I should have seen it coming.  Remember how I said that the Shelburne Falls strips were smaller than the Moda strips in my first Jitterbug post?  Here is what I meant:


Well, that meant NOTHING lined up.  My squares weren't actually square, my flying geese were too big for the too small squares, etc. etc.  Trying to sew the blocks together was torturous.  I guess I got lucky on the first few, because after that, this is what I ended up with:

Those flying geese are ALL OVER the place.

Most of these are okay, but the bottom, yikes!

Same story here.  And look at those HST in top left hand corner, oh no no no.


I made six blocks in all and decided to throw in the towel.  I wasn't having any fun and to try and get things to play nice, I was sewing some of the slimmest seams known to man, which in turn meant that they were popping open.


The Upside


By giving up early, I still have a lot of uncut strips that I can use for other things that require small pieces.  I am a big fan of zakka style so that means I have several books full of lots of fun options. For example, a variation on this sewing machine cover:


Or these cute coasters:


Maybe a little cosmetics bag:


As for the blocks I already made?  Pillows maybe? Or I could trim the other pieces I already have made up and create some kind of sampler quilt.  At any rate, they are destined to hang out in the UFO (unfinished object) pile for the foreseeable future.

The Most Important Question


 Now what quilt should I make to take to work? And what fabric should I make it with?!?