Friday, May 29, 2015

Tinker Tote


Have to make it.


Isn't that how all projects start? You see something that you HAVE. TO. MAKE. The tinker tote pattern is only available through a Craftsy class, which was not something I had done before. They are online, webinar type classes. After you sign up, you always have access to the class. The classes can be a little expensive fore my taste, but they are often on sale, so when a good one came around, I signed up!


I watched the first few segments right away. The video quality was great and since the bag is made using the quilt as you go (QAYG) method, which I  was completely new to, it was really nice to have a demonstration.

I printed the pattern and traced it onto my batting. I was ready to get going, all I needed were some scraps. So I pulled out my giant bucket and started digging. I found a few scraps that felt that they belonged in the bag, but that was about it.  I had a pretty specific image in my head of how I wanted to the bag to turn out and I wasn't willing to compromise. Discouraged, I put the project away.

My blank canvas awaiting inspiration in the form of sorted scraps.

Time passes.


From time to time, I would pull out the scrap bin with the intent of gathering scraps for the bag, but it just never came together. Finally, I realized that until the scraps were sorted, I wasn't going to be able to find what I was looking for.

The small stack of six scraps were all that I could put together before my scraps got sorted and they served as the color inspiration for the quilted panels.


Once I got my scraps sorted, I started working on my tinker tote and was completely obsessed until it was done.

Working on my layout of the bits and bobs.

Construction


The bag went together pretty easily. I made a few little bobbles here and there but when I had my two exterior panels done, I was so excited! They turned out just like I wanted, sort of low volume and soft but with little pops of color. It is hard to explain all the rules that I had when picking scraps for this bag. I don't have a lot of color theory vocabulary but as I read about it more, I realize that I apply a lot of color rules when I am sewing.

Making progress on my first panel.


Now that I had the perfect exterior panels, I needed to pick lining and binding. Ugh. Sometimes this is the worst.You need yardage, which means an expense that you only want to incur once. That last thing you want is to realize that you made the wrong fabric choice and have decide whether you put something sub par in your perfect project or, spend a bunch more money on something that you think will be more suitable.

Low volume, texty print for the lining.


I ended up with the I'm a Maker print from Art Gallery's Maker line for the lining and a small red floral print from Windham for the binding. This is the part where things got tricky. Even though I traced my lining from the same pattern piece that I used for the exterior panels, it was huge and did not fit in the bag at all. I think this is due to the shrinkage that is experienced with the QAYG technique. All that quilting sucks the batting together. I ended up just cutting away the extra fabric to get a good fit, and after having to piece in the interfacing for the lining because I couldn't find anything wide enough to save my life.

Close but not quite. I added little bits of interfacing to the top of the handles to make up for it.

And if that wasn't enough, once I got the lining together, it didn't fit at all!


Then there was the binding. I could tell from watching the video that Tara (the bag designer and class teacher), did not have the same perfectionistic standards that I do when it comes to binding. I could also tell since I would be fighting several layers of fabric and working around curves, that I was unlikely to be able to achieve the standards that I am used to when it comes to binding. Plus, I REALLY wanted the bag to be done at this point. So I forged on and I try not to look it or think about it too much.

On your left is what binding should look like. On the right is what most of the binding on the bag does look like.


The Finish Line


Overall, I am very happy with how the bag turned out. I really like the quilt as you go method and can see myself using for more bags in the future, whether it be with this pattern, or others.

The front. I love that I got to feature some of my favorite prints, like those red music notes!

The back. I love it this panel too! It was actually rather difficult to decide which one I wanted on the front of the bag.


Linking up!

Wednesday, May 27, 2015

WIP Wednesday: Hope Valley Pinwheels

As I mentioned last Wednesday, I have a couple of smaller quilt tops in the queue for quilting that I want to finish before tackling my bigger quilt tops, Fireworks and Hopscotch. I made pretty good progress, but am not sure when I will get more sewing time again before heading off to my first agility trial since February. Squee!!! I know Dexter will be one happy dog!

Stuck at home, doing nothing, makes for a very sad boy.

One of the hardest parts of being a new mom, for me, has been feeling like I am letting my two fur kids down. Dexter has been quite depressed and Fractal is going stir crazy. It has been very hard for me to watch,especially when I am stuck in the glider nursing the baby and can literally do nothing for them. I know it is not as bad as it is in my head since they have had trips to the dog park, one class, a journey to a friend's house and Buddy plays with them regularly in the backyard. But still, nothing like what they had pre-baby.

Pinwheels


I can't believe it, my pinwheel blocks are going to make it into a finished quilt. I am in shock really. These have been sitting around for so long and I was at such a loss for what to do with them that I was pretty sure they would never amount to anything. Which bummed me out severely since I had made them from precious Hope Valley Fat Quarters won when my mom and I saw Denyse Schmidt at a local quilt store.

The first pinwheels I sewed. . . in 2012!

In the end, as it always seems to be, the answer was to keep it simple. Really simple. I just sewed the squares together: no sashing, not setting on point, nothing.  Originally, I had really wanted to do a very modern, non-grid layout with these very traditional blocks, but it just wasn't mean to be. Mostly because that would have required more blocks and I have no interest in making any.

The odd number of blocks I ended up with before quitting.
I managed to talk myself into sewing one more to
make it an even 20.

I was really nervous when I went to get backing for this quilt since I knew that there was no way to get something from the Hope Valley line. My thinking was to do a shot cotton since to me they have bit of that worn vintage-y look like the Hope Valley prints. Instead I ended up with a plum and orange print for Denyse's new Franklin line (which I like quite a bit).

It is very helpful that designers often use the same color palette from one collection to the next.


Again, I went simple with the quilting. The plan was a one inch grid, but after getting all the vertical lines done, I felt like adding the additional quilting would be too busy for the small quilt. So I called it good.


All that I have left to do is bind the darn thing. I have this pumpkin colored Kona for the binding, but I'm not totally sold on it, so I have working on quilting my Bento Box baby quilt instead.


What do you think, should I just go for it with the binding, or could I do better? Something a bit more unexpected perhaps?

Linking up with WIP Wednesday and Let's Bee Social!

Saturday, May 23, 2015

Zip, Bang, Boom!

Two little quilts for two little firecrackers.


When I was in high school, I had a great group of guy friends.


Even better, I still have a great great of guy friends :)


And for the cherry on top, they have married (or are about to marry) some fantastic women. My friend Rob set the bar really high when he married Holly.


She is an amazing entrepreneur and after countless hours of work squeezed in between a day job, husband and child, her business is really taking off. Please go and check out her shop, MarshMueller, full of goodies for little ones in fabulous fabrics!

Before Tatum was born we were over at Rob and Holly's. It just so happened that Holly was also pregnant, with her second baby. Our boys were due just a few months apart and even though Buddy and I were keeping the baby's name to ourselves, we thought it was important to compare notes with our friends :)

During the conversation, it came out that we were both thinking about names that resulted in awesome initials, TNT for us and BAM for them. Hehe.

SO, when I saw this fabric when I was shopping for flannel for burp clothes, I had to have it and I had to turn it into matching quilts for the boys.


I wanted the quilts to be simple and graphic so I went with a brick layout in bright solids and geometric prints. I searched online for a font that captured the comic book theme. It took some doing, but I think I hit the nail on the head!

The applique foot for my Bernina makes this kind of thing a breeze.


Voila!

This picture gives and interesting view of shrinkage since the TNT quilt has been washed and BAM's has not.

I love how these turned out. I may have spoiled the surprise for Holly a bit, but I think she'll forgive me ;)

I smell a photo shoot in our future!!!

Linking up:

Wednesday, May 20, 2015

Fireworks Quilt: Work in Progress

A Completed Quilt Top


Squee! It's finally done. Well the top is done. All 880 pieces. It is pretty glorious and I am very proud that I stuck with it. This project started a very long while ago, you can read a bit more about it here. I definitely got better at flying geese as I went and I learned the value of ironing without steam, which as a steam-a-holic, was a big deal for me.

As you can see, my points turned out pretty good.


I took the last few days before Tate was born off from work. I was scheduled to be induced on a Tuesday evening and decided the Friday prior would be my last day. If I was going to have to be induced, which I totally didn't want, I was at least going to take some time to myself before it happened.

It was totally worth it because I nearly finished all my in progress quilt tops! Meaning that I have six quilts waiting to be quilted. Oh boy.


Yesterday I made my first trip to Fabric Depot since Tate was born. They were having a good sale which I wanted to take advantage of since I needed a lot of fabric for quilt backings and bindings! Here is what I came up with for the Fireworks quilt:

Since I feel like the quilt is a little dark overall, I wanted something lighter is value for the backing.
The plum chevron print will be great on the back and I am going crazy with the
bright citron for the binding!

Now to decide how to quilt it. I hope it doesn't take me months and months but realistically, I will quilt my smaller quilts first so it may be a bit before I get to count this one completely done. For now, I will just bask in the glory that I no longer have any little pieces hanging around waiting to make their way into quilt tops!

Linking up with WIP Wednesday and Let's Bee Social!


Saturday, May 16, 2015

SCRAP ATTACK!!!

What Now?


After getting the nursery done, I pretty much lost my baby sewing mojo. I don't know if I was just tired of the color scheme, or what, but it was time for something else.

One of the things that as been on my "To Do" is to get my scraps under control. For the longest time, I looked at beautiful scrap projects and thought, "I am so new to quilting, it will be forever before I will have the kind of scrap stash it must take to make something like that." I would get dismayed when instructions said things like "pull a few scraps from your stash." For me, that meant a trip to the store.

In the meantime, I had a scrap bucket that everything went into. In my mind, there were't very many, so they didn't require organization. I could just pull something out whenever I needed it. Then one day, it was time to do that and this happened! Had I really made that many scraps?


Now, at this point did I immediately clean up my act and sort those scraps? Not a chance. Instead, I got a bigger bucket!!! Insert giant Cheshire Cat grin and accompanying husband eye roll here. Eventually, that bucket was also full to the brim and at this point, I had no idea what was at the bottom. It was time to do something about the scraps.

Information Gathering


It turns out there are a lot of different scrap sorting theories and approaches. I found reading different blog posts and books specifically on scraps particularly enlightening around this matter.

Sunday Morning Quilts


When I bought this book, I didn't realize that it was about scraps and scrap projects. Reading through it was really the first time I thought about scrap storage and organization. It was a total eye opener. I also realized that I had been putting things back into my stash that really should be in with the scraps.

Scraps, Inc.


I bought this book looking for additional scrap sorting insight and for the beautiful projects.

Blog Inspiration

One of Cynthia's beautiful scrap quilts.

Long arm quilter and blogger extraordinaire Cynthia Brunz has a great series on scraps, that I find really helpful for thinking outside the box when it comes to scraps. I also find it good for motivating me to think about actually doing something more than a coaster with them. You know, like a whole quilt!

Adventure!


Armed with lots of good scrap info, the plan was to tackle it during my maternity leave. Something that I could easily start and stop. The sorting plan to start with was pretty easy, just sort the scraps by color.

Then, about a month before Tate was born, I realized that I wasn't really equipped to sort my scraps in a way that would allow me to stop and start. Bugger. I needed a set up that I could transport and collapse easily without having to put everything away each time. Buddy and I headed off to the Container Store (his third favorite store after Best Buy and Home Depot).

On our outing everything that we found was either too big or too expensive for a short term project. At some point, something got mentioned about grocery bags and I knew we had it. I went home and started going through all the paper shopping bags I had, trying to find enough of the same size. There are a lot of color groupings, so I wanted 13 bags total. I guess I have also been collecting shopping bags for a long time because I had a lot of the small tote size. I cut the tops off and binder clipped them together and Voila! My scrap sorting station was born!

The half bags make for easy sorting. Added bonus, they fold up quickly and store easily in another left over shopping bag.

Mojo


Of course my sorting station couldn't go untested. I didn't want to be locked down watching a newborn and realize that my plan was totally flawed. So I grabbed that giant bucket and started tossing scraps in bins. Wouldn't you know it, before the end of the evening, I was DONE. Say what!?! I thought this was going to be a multi-day extravaganza. I guess you could say my sorting station was efficient!


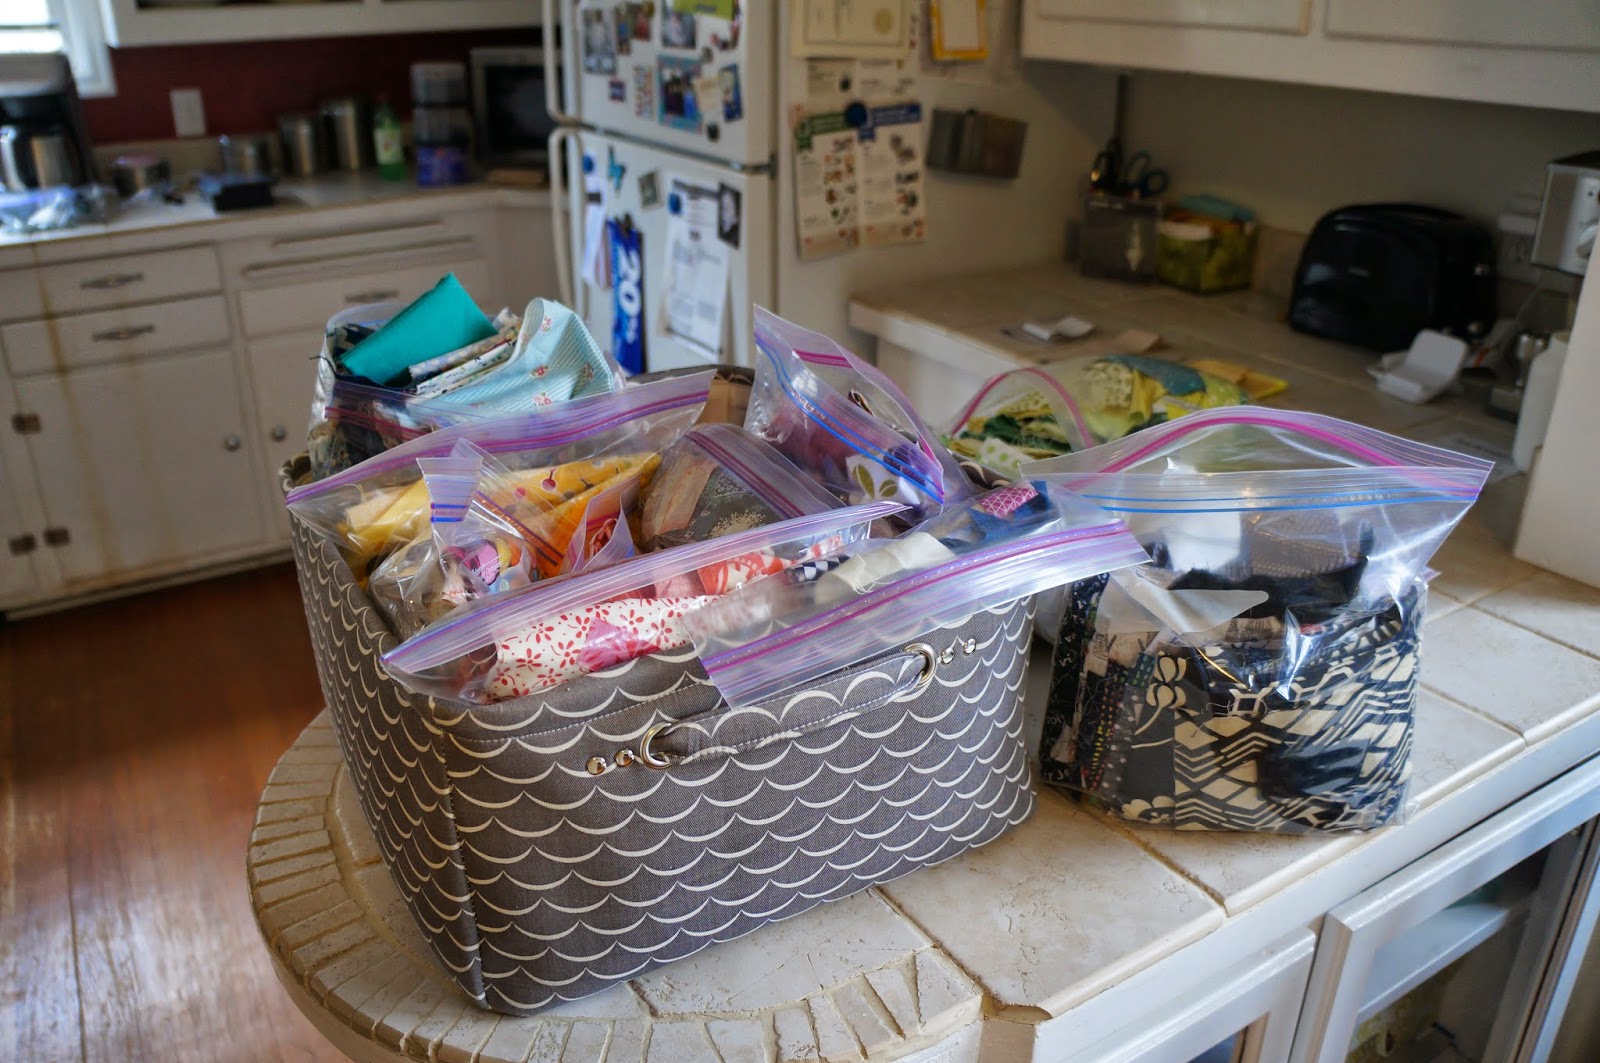
Lots of Ziploc bags and a fabric bucket now hold my color sorted scraps.

I found that the blue and green bags were so full that I couldn't close them.


Not to fear, there is still much more that I can do now that Tatum is here. Next is sorting each color grouping by size. This is necessary if you are going to tackle a quilt so that you can easily pull out pieces that are big enough for your project.

However, there are a lot of projects that don't require that kind of sorting and I just happened to have one on my list waiting for my scraps to find some semblance of order. Using scraps and marking something off my UFO list? Yes, please!

Stay tuned, my next post will be about my finished Tinker Tote!