Sunday, March 22, 2015

Nursery Reveal!

A Room for Tatum Noah Taylor


After a brief tussle over the idea of a dual purpose nursery/craft room, we set about re-arranging the house to accommodate my hobby AND our growing family.

We decided early on the bright green walls. Before we  knew if we were having a boy or a girl. From there I added colors, lots of bright colors: deep blue, orange-red, sunny yellow. Grey accents would calm things down.

Originally, the theme was hot air balloons and elephants. Mostly, because I had seen these amazing hot air balloons in Dundee, OR when we were out there on one of our wine tasting adventures with my dad. They were my reward for participating in the annual Thanksgiving pilgrimage despite not being able to partake in the festivities.


After this great start, I did a little more shopping and decided that my theme was too disjointed and narrow. I decided the remedy was to broaden the theme around the balloons to be an overall travel theme. This would also allow us to incorporate Buddy's love of airplanes. I don't know why I was surprised when he told me that he had a set of painted, steel airplanes in the attic from when he was a kid. I loved them and I loved the idea of incorporating them into the nursery. The new theme was winner!

Worried that the planes would get lost on the bright green walls, we mounted them on burlap and framed them in bright white.


With the planes and the hot air balloons in place, it was time for the fun stuff!

The Handmade Bits


When visiting the amazing Holly of Marshmueller at a craft show at Laurelhaurst school, I found this great print with the raccoon by Marika Paz. Since it wasn't a big print, I knew I wanted to do a mini collage. We added the wooden "T" but more was needed to complete the look.


I found the quote in a stamp pack that I had and knew I wanted to use that. I went looking for things to complement it. I ended up with this cute little windblown bunny from one of Cricut cartridges and am very pleased with how it came out.


The last piece to come about was the "EXPLORE" sign. Ingredients were: online inspiration, a Martha Stewart tutorial, scrap wood, Mod Podge, Cricut cut letters and a perfect map print paper.


The changing pad cover was made using this tutorial. Something went awry with my math/cutting and there is less fabric around the bottom than ideal but it is certainly functional. I adore this print and the fact that it isn't overly matchy with the rest of the nursery fabrics.


The overall look = LOVE


I was inspired by this pin to do the airplane, banner and clouds over the crib. I was very thankful for the applique foot my mom bought me last year for Christmas for my Bernina. It made creating the banner a breeze and gave it a very polished look.


The clouds are felt stuffed with polyfil and hand sewn with red embroidery floss.


I wasn't originally going to make a crib skirt, but after looking at buying one and discovering what a plain grey one was going to cost, I figured taking the time to do it was worth it. It also meant that I could customize it with Tatum's nursery fabrics.

Bizzy Kid Quilt

Last but not least, of course there had to be a quilt! Not out of the norm for me, I had purchased a large stack of fabrics prior to settling on a pattern. I was on the hunt for something simple and not too fussy, but also a little more than just squares and rectangles. The Bizzy Kid pattern from Cluck Cluck Sew, hit the nail on the head. It required a few additional store trips to secure all the necessary fabric but overall the quilt went together easily and most importantly, turned out exactly like I wanted.


The back on this one tripped me up a bit. I changed my mind a few times and ended up needing to stretch my yardage. Incorporating the squares to create the cross pattern allowed me to add some super fun prints and stretch my yardage. Win!


I know it on the big side for a baby, but I am looking forward to snuggling under it and reading Tate a story very soon!


Now all we need is a baby! With my due date looming, I know we won't be waiting too much longer :) :) :)


Tuesday, March 3, 2015

And the Kitchen Sink: An Update/ Year in Review

A Pretty Good Year.


I have tried to keep up here with all the things that I have made and what it took to actually get them made. For the most part, I have done really well. Due in part to the fact that I didn't make that much stuff this year. Instead, it was about me and Dexter getting out and doing our thing.

We made great strides in agility this year and it is something of which I am very proud. We attended a couple of seminars which I think really helped me gain confidence in my skills and in my dog.

Ditching Dexter to get in position for a blind cross.


I had the opportunity to run a friend's dog on some very advanced courses which taught me a lot about myself. Plus, Dexter and I started competing at the Master's level ourselves which really pushed us. All of this culminated in getting four tournament Q's in one weekend (Grand Prix, Steeplechase, Master's Challenge Biathlon)! Lastly, I was awarded best new member by my agility club at our Annual Christmas/Awards dinner. I was totally shocked and honored!

On the Family Front


At the end of July, after copious amounts of begging, cajoling and pleading with the Husband and a slight scare with the US/Canadian border, we brought this guy home.

Cute doesn't even begin to cover it!


At nine months, I am hoping he is almost all done growing. He is quite a bit taller than what I expected!

He really is a handsome guy.


He will be my future agility partner. The husband did an awesome job helping with teaching him good manners and now we are working on baby dog agility stuff. Three dogs makes for a very full house but we figured we could manage until our move in Spring 2016. Then, only five days after bringing Fractal home, we found out that we will be adding a two legged member to our family!

So the time quickly flew by, helped along by the fact that I slept through most of August and September and then BAM! it was the holiday season. And now, just like that, Spring is upon us.

Sewing Whirlwind

After a first failed attempt, we found out that we are going to have a little boy! I was so relieved to finally know the gender. So much planning could finally start: names, nursery and, of course, things to make! Let me tell you, gender neutral is a myth people. I have a lot of respect for families who wait to find out what they are having. I couldn't do it.

Me at 31 weeks and Fractal at 8 months old


I went on a total fabric buying binge at the Black Friday sales but when I got home I didn't actually dive in to sewing things from those giant stacks of fabric. Instead, I made the decision that I was going to try and sew up nearly all of my works in progress. Eep! The goal was to be done by the end of the year and while that didn't happen, I made darn good progress. I knew that there were a few things that I wasn't going to include in my list, for various reasons. Still, this was not a short list. However, I figured that since I would have a long break from agility over the holidays (Dexter and I did our last competition two weeks ago when I was 35 weeks along), that I would have plenty of time to sew. And sew I did. Here is what I have made/finished between September and mid-January (bear in mind that most of these were already started):

Zombie blanket

This was originally going to be a crate blanket for Fractal, but it was just too cute to give to a dog!


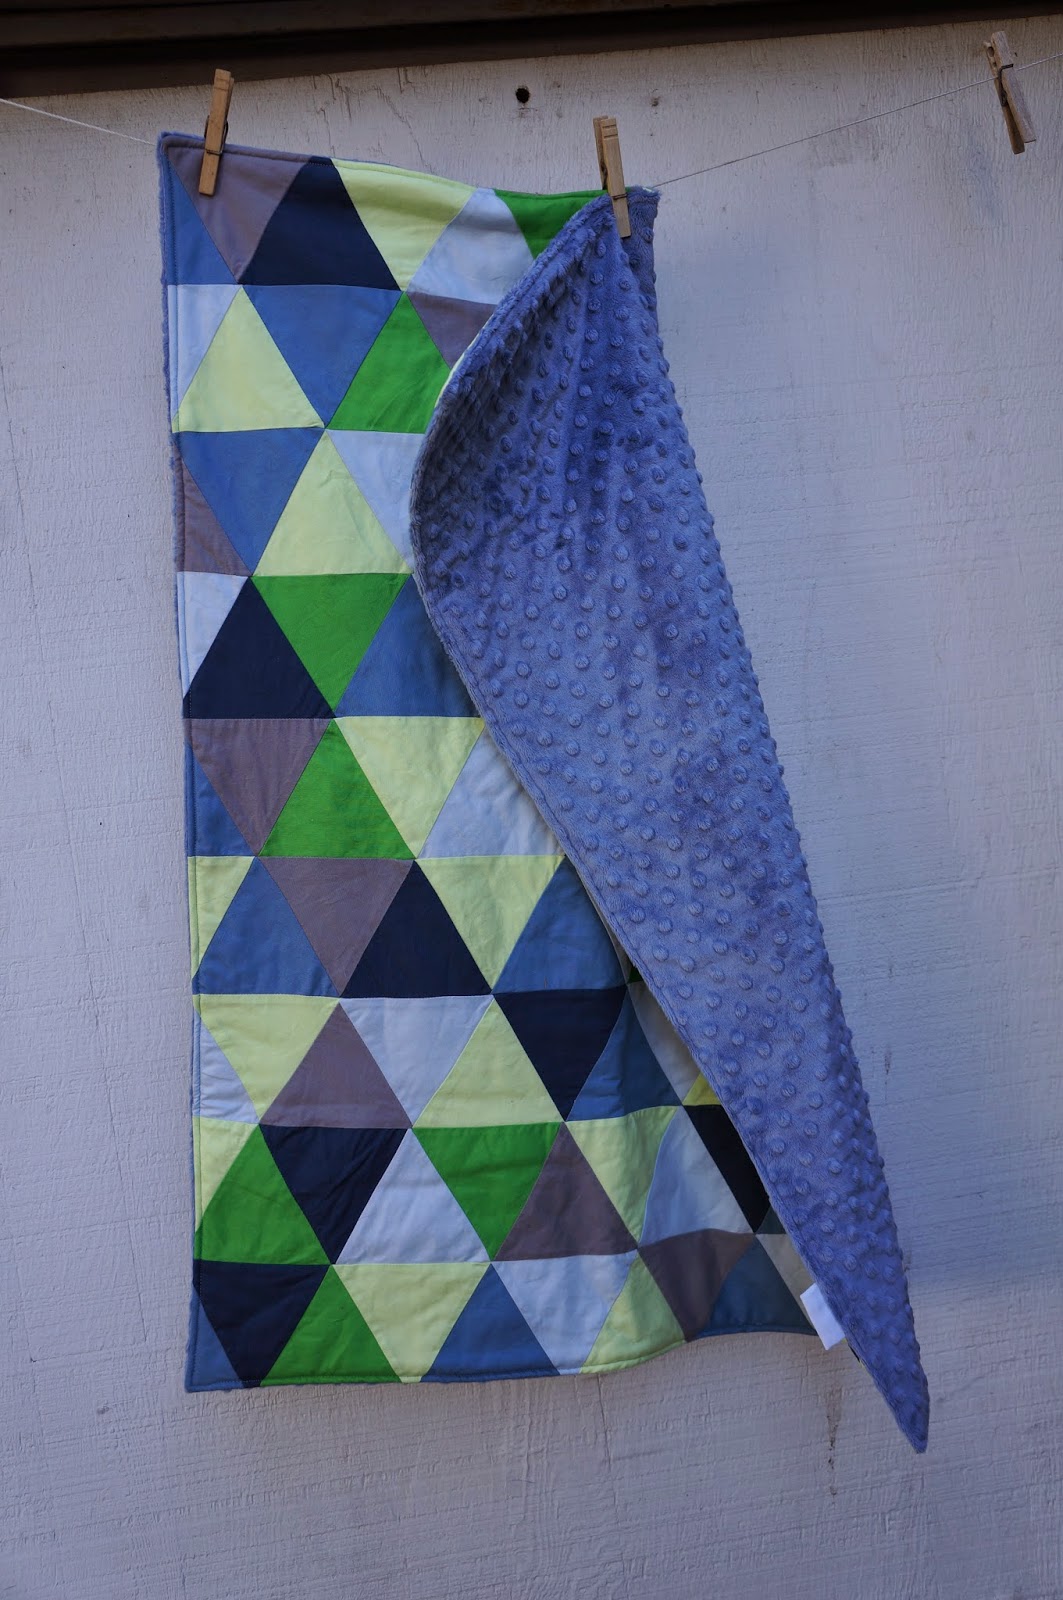
Triangle quilt

This is for sale in my Etsy shop


Drawstring tote

You can read more about this project here.


Penny patch

You can read more about this one here and here.


Critter quilt

This was one of those quilts where I decided I could no longer resist the fabric line. The critters were just too darn cute. I bought fabric and backing with NO pattern in mind. It's always a little tricky coming up with something that will use only what you have, but this one came out great! I can see myself revisiting this pattern in the future.

As you can see, my pattern was a little off in the sense that my top ended up just a little too big for my backing. Luckily, I had plenty of scraps to use to stretch the yardage.


Originally, this was going to go up for sale in my Etsy shop, but my mother was desperate for me to keep it. In the end I caved in and it is now at her house.


Cherry charm baby quilt

Some friends of mine also recently welcomed a little boy into their home and I wanted to make Mr. Hayes something.
Echo Star pillow

This little 10" x 10" pillow gave me lots of trouble but I do like the pattern. This is one where you want to think very carefully about the values of the different colors you use. Mostly, for a quilt, I think monochromatic would work best.

I was pleasantly surprised when this pillow blended in beautifully with my nursery color scheme and it now lives on the glider.

Mostly, pillows are not my friend because the backing and binding process does not go well. I won this round, but just barely. I am sworn off pillows for the time being.


The BEAST

So the truth is, I never got a finished pic of this one. With pretty good reason. I finished it in the dead of winter so photo ops were few and far between. But mostly, it is SO big that I needed two people to hold it up. Fractal is a good helper, but not quite what I needed.

At any rate, it was delivered at Christmas to Brother and , let's be honest, his dog. I think Cormac may use it more than he does. Although I requested a picture of the quilt from him, my guess is, that it isn't real high on his priority list!


Thread catcher

I randomly decided that I really should have a thread catcher. I was completely inspired by this Pin and had this done the very next day.

As you can see, I really did need one and quickly put it to good use while I continued to churn out the finishes!


Mom quilt

This was another Christmas delivery. As you can see, not the kind of thing I would normally make. Beautiful, but not my style :) My mom chose the pattern and most all the fabrics. I really struggled with how to quilt this one. In the end, this was my second quilt with free motion.

The arches were the free motion part. Some of them look good, others, not so much. However, the overall effect of the quilting turned out even better than I imagined. I dare say it looks fancy!


Make-up bag

Another make-up bag for my Etsy shop. One day, eventually, I will actually make one for myself.  I really like the color/fabric combo and was almost sad that all I had were tiny scraps to work work with.
Hourglass quilt

I love this quilt! The colors are so bright and fun! It is for sale in my Etsy shop.

I'm not actually sure if I started this quilt before this one or not. At any rate, this one, though much smaller, took me a lot longer to finish. I struggled with my design choice to use the newspaper print as my background fabric, especially when I realized I didn't have enough of it and couldn't get more. Eventually, I decided to just go with white for the rest of the squares. I love the effect that having both created in the end.

I knew I was going to do simple outline quilting on this one. It only took about two hours!

This backing may look familiar. That's because I also used it on my Penny Patch quilt. I love prints like this that are tone on tone but so much more interesting than a solid.

Phew are you tired yet? I know I am. BUT, now I get to do my sewing for the little boy guilt free! It is an amazing feeling to have made all this progress and really lifts a huge weight not having so many projects hanging over your head!

Here's to a productive 2015!

Up next, the baby makes! Hooray for more pictures!

Monday, February 16, 2015

Penny Patch: A Finish!

I did it. I free motion quilted a whole quilt. A pretty big quilt at that. And . . .  IT'S AWESOME!

I don't really know what else to say about it. I am over the moon proud of myself on this one. Plus, I said most of it here.


I will make one confession though. When I very first sat down and was quilting my first row, I was having a heck of a time. I couldn't figure out what I was doing wrong. I knew it would take a bit to get back in the groove I was in when I finished my drawstring bag, but this felt like more than that. Not sure exactly what finally made it click, but I realized that I hadn't lowered the feed dogs. DOH! Me, myself and I had a pretty good laugh about that, and now you can too.


It has taken me a lot longer to share than finish than I intended but alas, the short and often rainy days here in the Pacific Northwest make is difficult to get good, well any, outdoor photos. Thanks to our current lovely false spring, I was able to get to my mom's house and take some pictures! We were still a limited on what we could do with the very damp ground and lack of greenery, but still, pictures to share!

I love how the back came out. There wasn't enough of the purple print to do the whole thing so I supplemented with some giant squares of coordinating fabrics.

I almost didn't manage to leave my mom's house with this with the quilt, she has been trying to claim it for her own each and every time she sees it, despite the fact that I made her a quilt all her own, in fabrics she picked out! More on that later!


Wednesday, December 17, 2014

Testing, Testing

Practice makes perfect right? Well, I figured at least it couldn't hurt. Before launching into the challenge of FMQ my Penny Patch quilt, I decided to do a little test project.

I was browsing around on Pinterest and came across this little cutie: http://www.pinterest.com/pin/238831586462998727/

I decided this was exactly the project I needed to tackle to practice my FMQ. Bigger than a coaster, but not to the level of making another quilt.

It always amazes me how much patchwork "shrinks" as you sew it!


I will admit that I did not buy this pattern. I know right. I feel guilty about it, but that is one of those things about quilting. You get good at looking at a pattern and being able to see what it took to put it together. Especially if it is something classic like squares or half square triangles. Also, there are a lot of free tutorials out there on quilted drawstring bags. . . so, yeah. How do you decide if you should purchase a pattern or not? I would love to hear others thoughts on this one.

Here are the tools I used to come up with my "pattern."

  • Looked at the finished dimensions listed on the pattern. I decided that seemed like a good size and figured up how many finished 1.5" squares I would need to get close. It was important to me to do the quilting on the EXACT same scale that I would be doing for the Penny Patch quilt. So, even if I had purchased the pattern, I likely would have needed to adjust it anyway, but I rationalize.
  • Used a free tutorial from Pink Penguin on how to create the casing on the top. I ended up needing to make the strip bigger to accommodate my larger cording, but otherwise was able to follow the directions in their entirety.
  • Went to my go-to bag book: The Bag Making Bible for the instructions on installing the flush zipper. I have used these instructions quite a few times but never seem to be able to remember all the steps without looking them up.
  • Followed the directions that came with my grommets.
  • Looked at a similar drawstring bag I have in the house to figure out the amount of cording I needed. In the end, it as mostly a guess so I hedged my bets and over bought. Many thanks to the Husband who helped me figure out how I needed to insert the cording so the bag would actually cinch. I was nowhere on that one.

And TA DA! A cutie patootie little bag!


Now don't get me wrong, there are some downright ugly flowers on this bag. The FMQ definitely took practice and getting used to, but by end, I was pretty happy with how my little flowers were turning out.


I intended for this to double as a scrap busting project so I went to work digging through my enormous scrap bin. BUT I was so inspired by the color palette of three little scraps, that I ended up at Fabric Depot. I was able to use scraps for the lining of both the inside of the bag and the pocket, so it wasn't a complete scrap failure. I am glad that I went for it though. I absolutely love how it turned out! And to top it all off, it really was great practice before diving into my Penny Patch.


After careful consideration of the "ugly" flowers on the back of the bag, I decided this bag was just too cute to languish around my house so I have listed it for sale in my Etsy shop. Check it out!


Wednesday, December 3, 2014

Tackling the BEAST

The Biggest of them All


Remember this UFO?


A twin size quilt for Brother. I have been pretty intimidated by idea of quilting this at home. I toyed with the idea of renting time on a local long arm machine, but decided I am too cheap and too busy to make that work.

After a lot of the usual hymning and hawing, I decided to keep it simple just do straight line quilting.

I pin based half of the quilt and spray basted the other half. I figured that if the spray worked out well, after I quilted that half, I could take the pins and out and spray the other half. That way at least half of the beast would be fully secured at any given time.

I'm not going to lie, this is A LOT of quilt to wrangle. I moved my machine as far over and as far forward on the desk as I could to allow for maximum work space.

The first bit in the very middle was the hardest. After that, it got quite a bit easier and I hardly noticed the giantness of the quilt. I did a full 3.5 hours and finished half of the quilting!!!

The rest didn't go quite as quickly, but I was excited to get this done and managed to find time here and there to get it all finished up. All that is left now, binding the beast. I have the fabric and plan to machine stitch and finish with a zig zag as opposed to hand stitching. I know that this quilt will need to endure a lot of washing so I want it to be extra durable.


The quilty goodness.

Hopefully this will be a finish very soon, but there are a few other projects out there distracting me. . .